
Please disclose if any significant portion of your mod was created using AI tools by adding the 'AI Generated' category. Failing to do so may result in the mod being removed from Thunderstore.
ValheimFloorPlan
Valheim Floor Plan mod with in-game terrain-aware placement plus bundled Floor Plan Designer web app for creating .vfp plans.
| Date uploaded | 2 weeks ago |
| Version | 2.1.4 |
| Download link | RetiredCoders-ValheimFloorPlan-2.1.4.zip |
| Downloads | 109 |
| Dependency string | RetiredCoders-ValheimFloorPlan-2.1.4 |
This mod requires the following mods to function

denikson-BepInExPack_Valheim
BepInEx pack for Valheim. Preconfigured with the correct entry point for mods and preferred defaults for the community.
Preferred version: 5.4.2333README
Valheim Floor Plan
Build complete multi-level structures in Valheim from pre-designed floor plans.
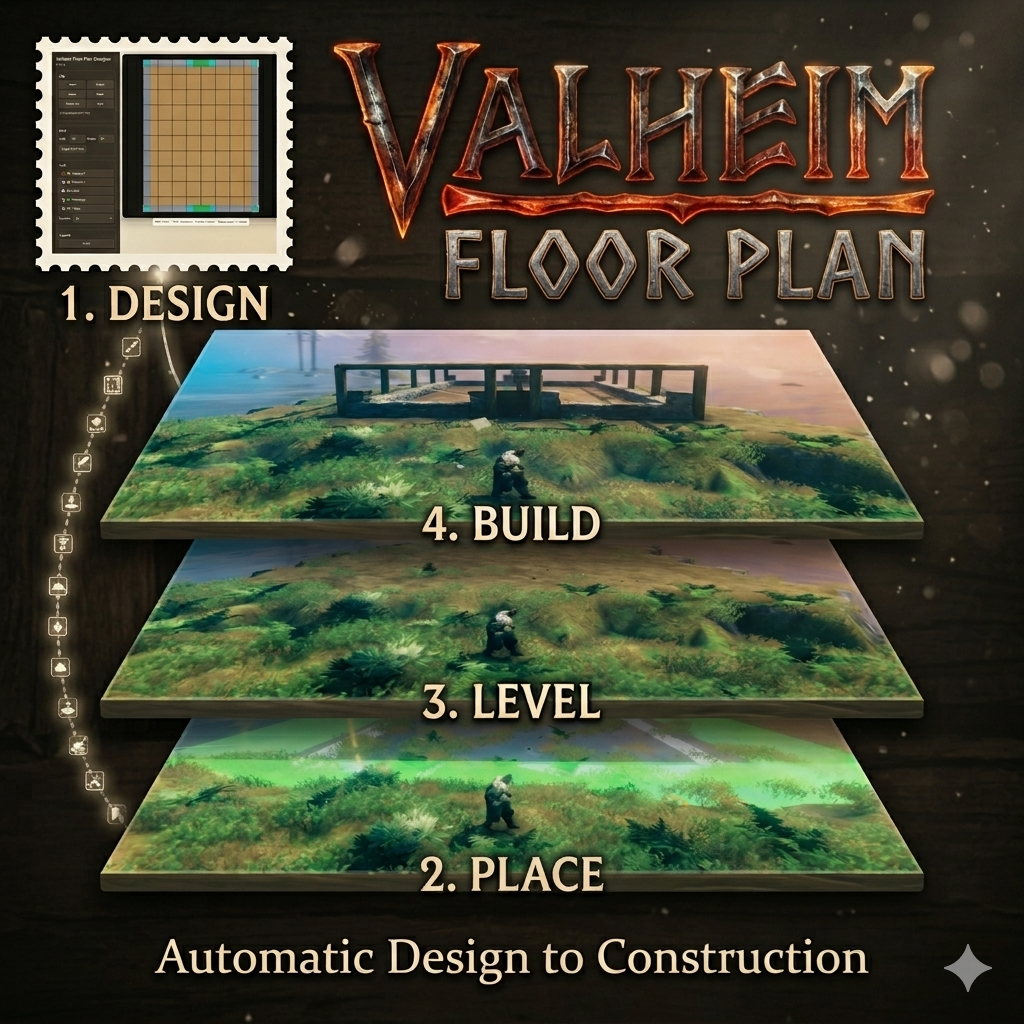
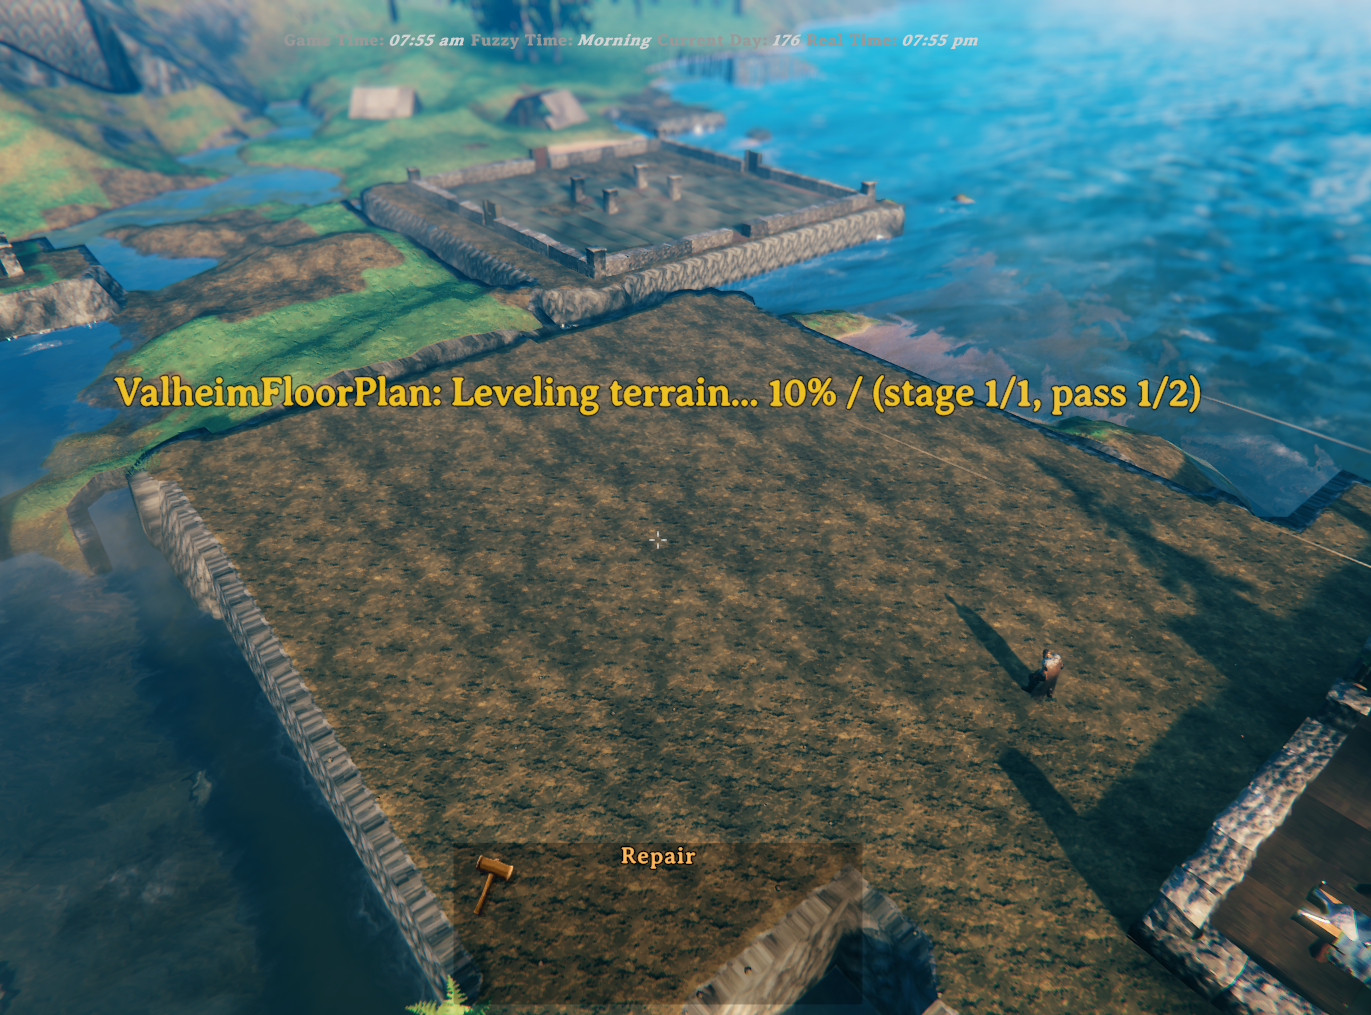
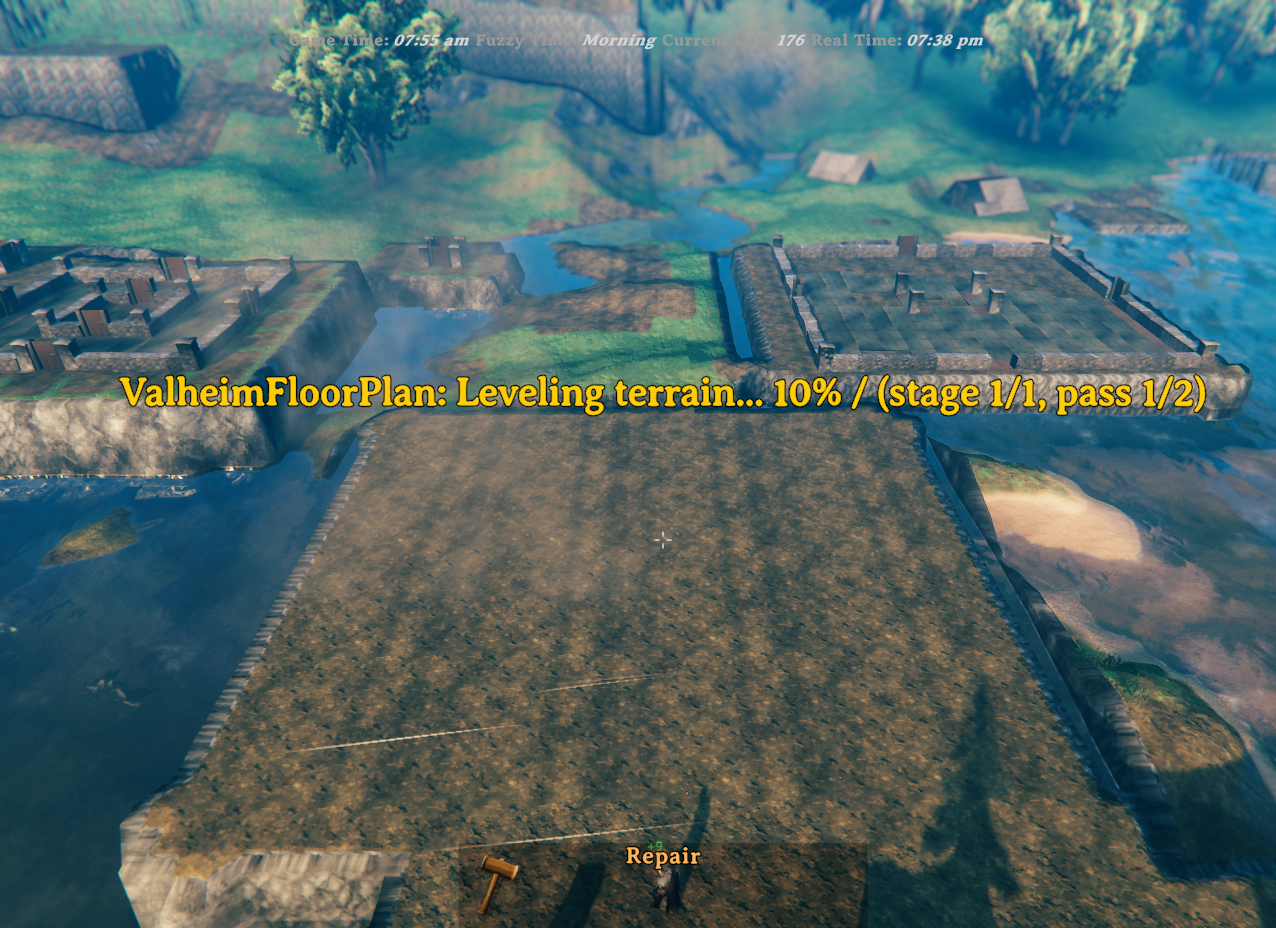
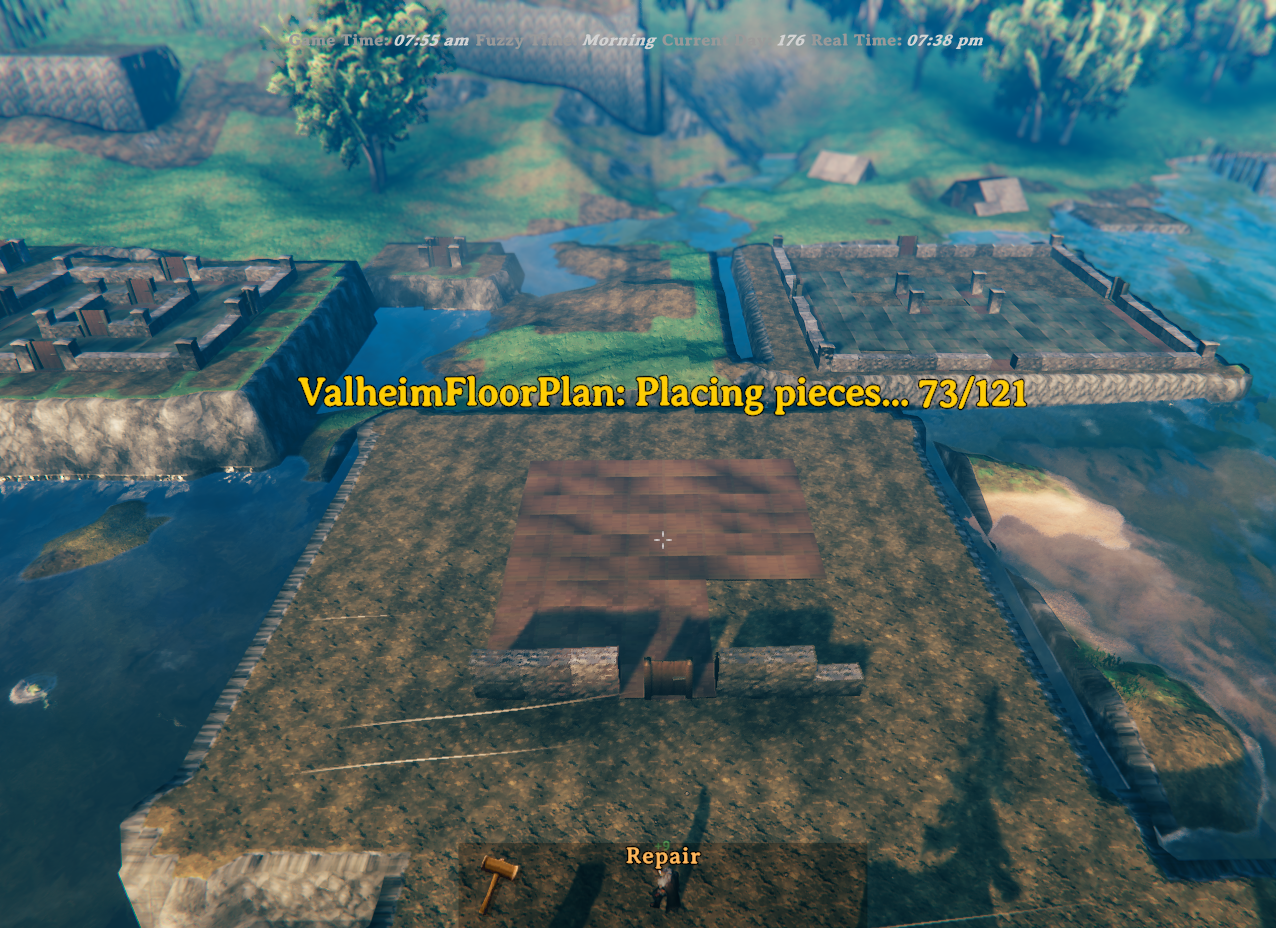
Anyone who has spent time building in Valheim knows the real effort starts before the first wall goes up — clearing uneven ground, wrestling with terrain spikes, and nudging pieces into alignment one agonising centimetre at a time. Valheim Floor Plan takes all of that away. Design your layout in the included browser-based Designer, save it as a .vfp plan file, and the mod handles the rest: it levels and blends the terrain, captures a snapshot for instant undo, and places the entire foundation in seconds.
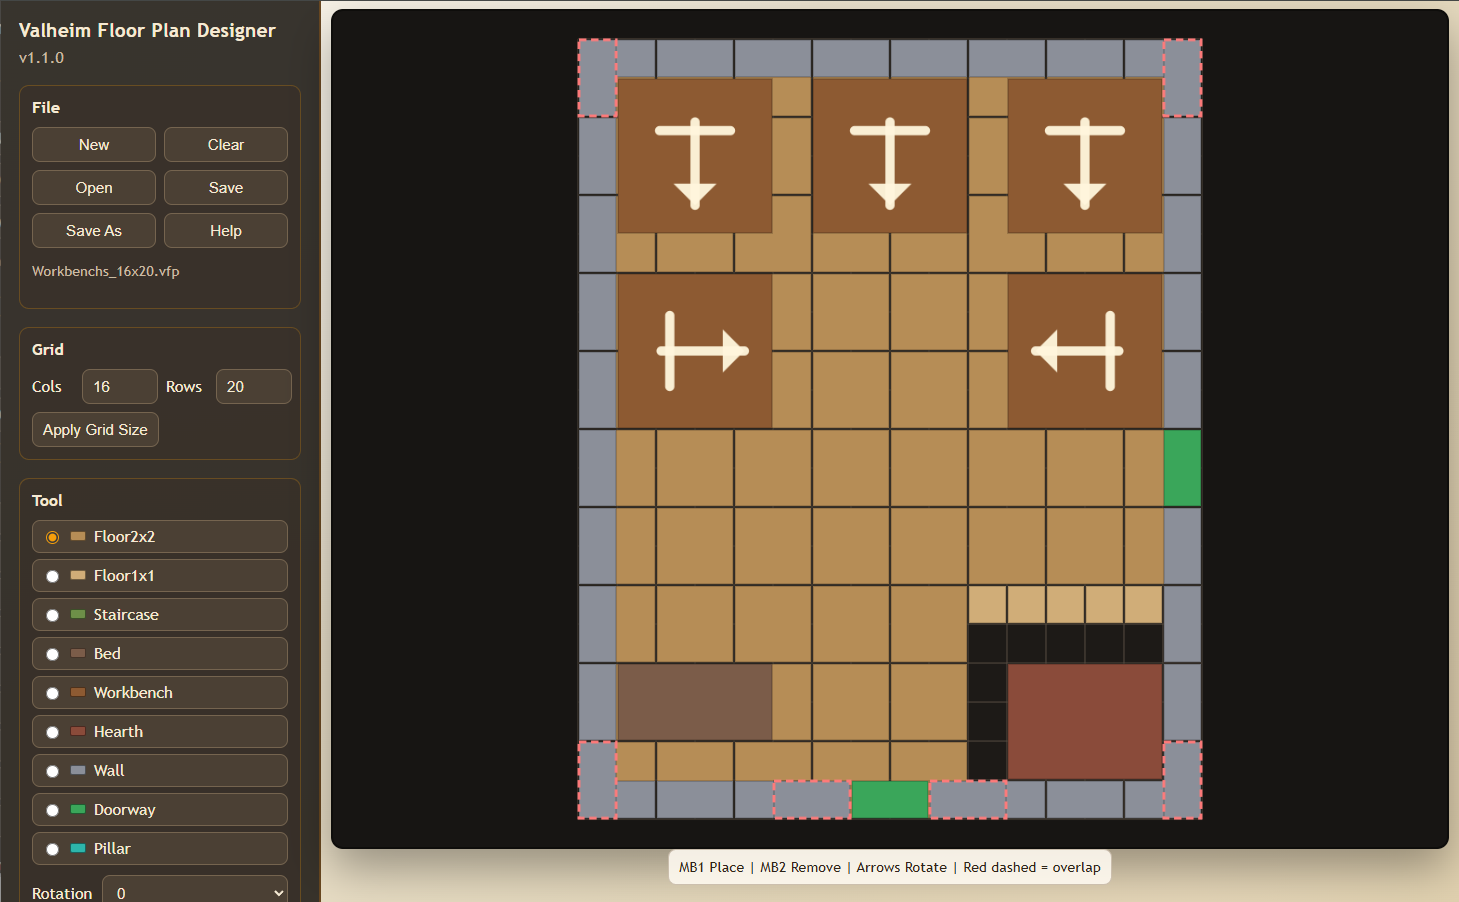
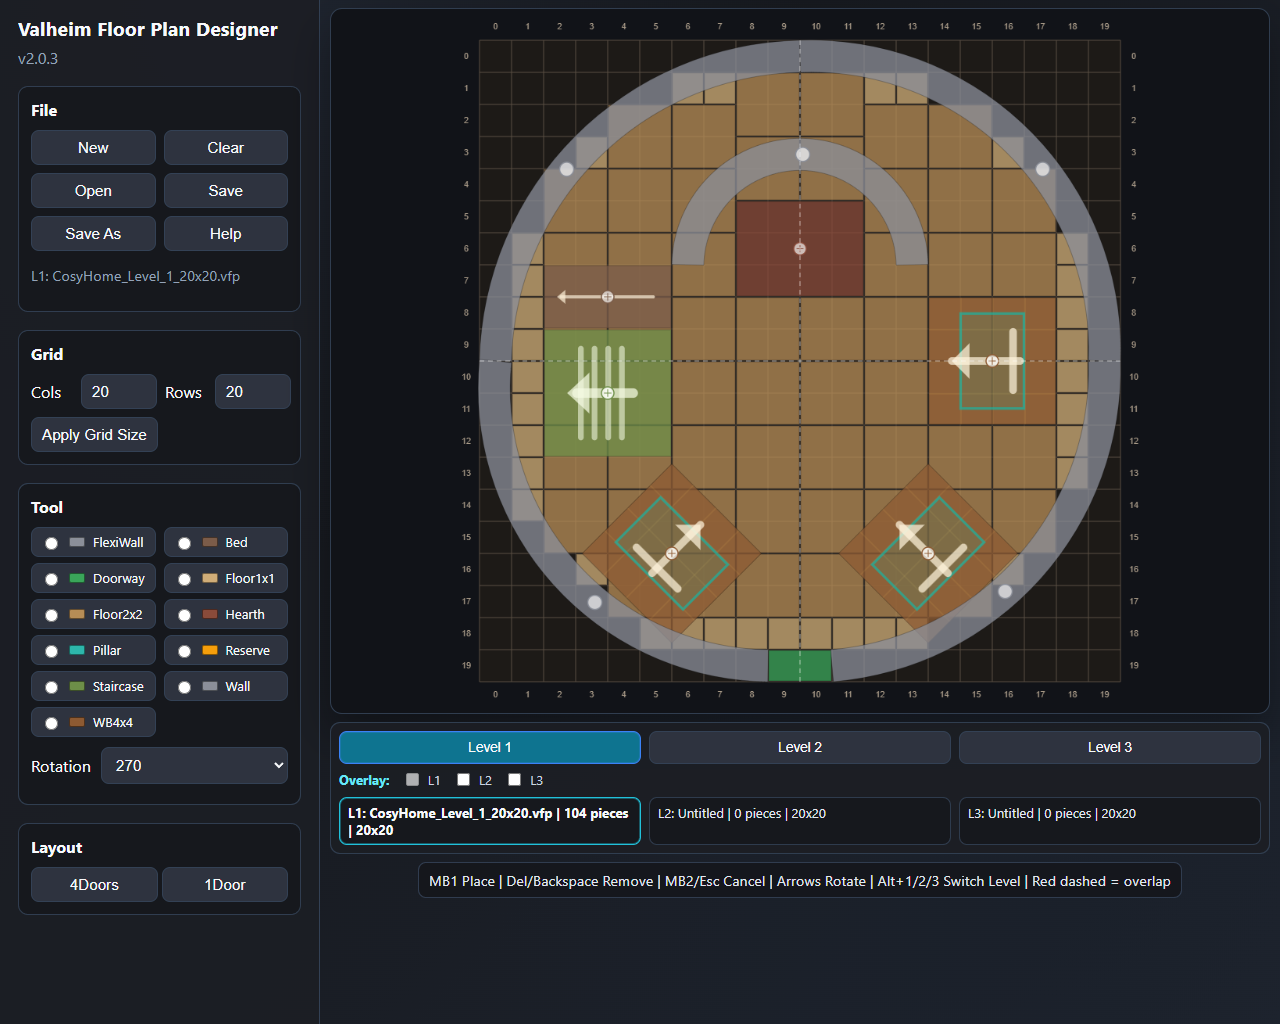
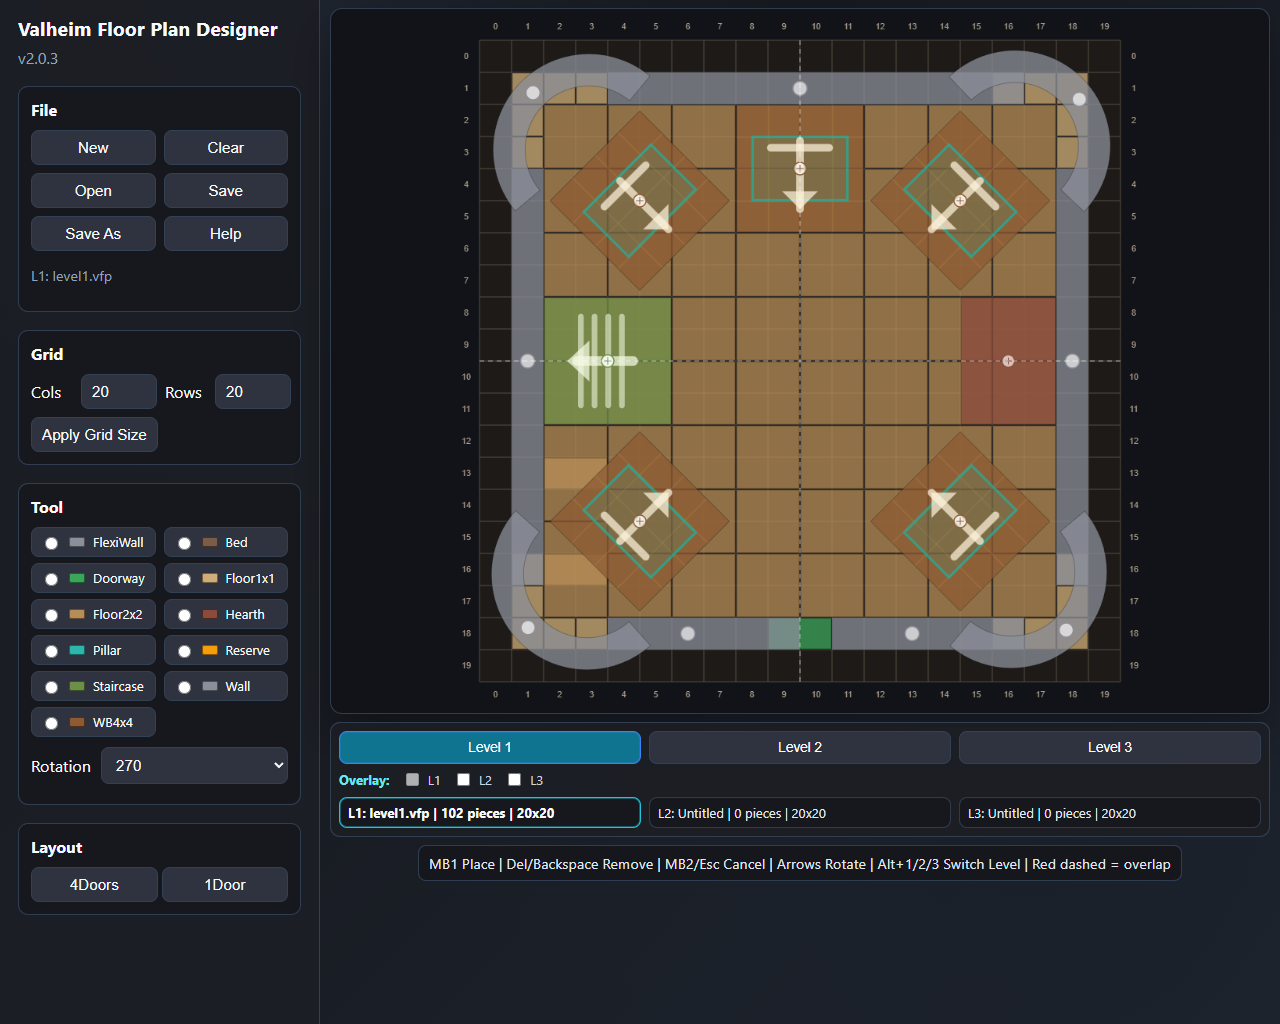
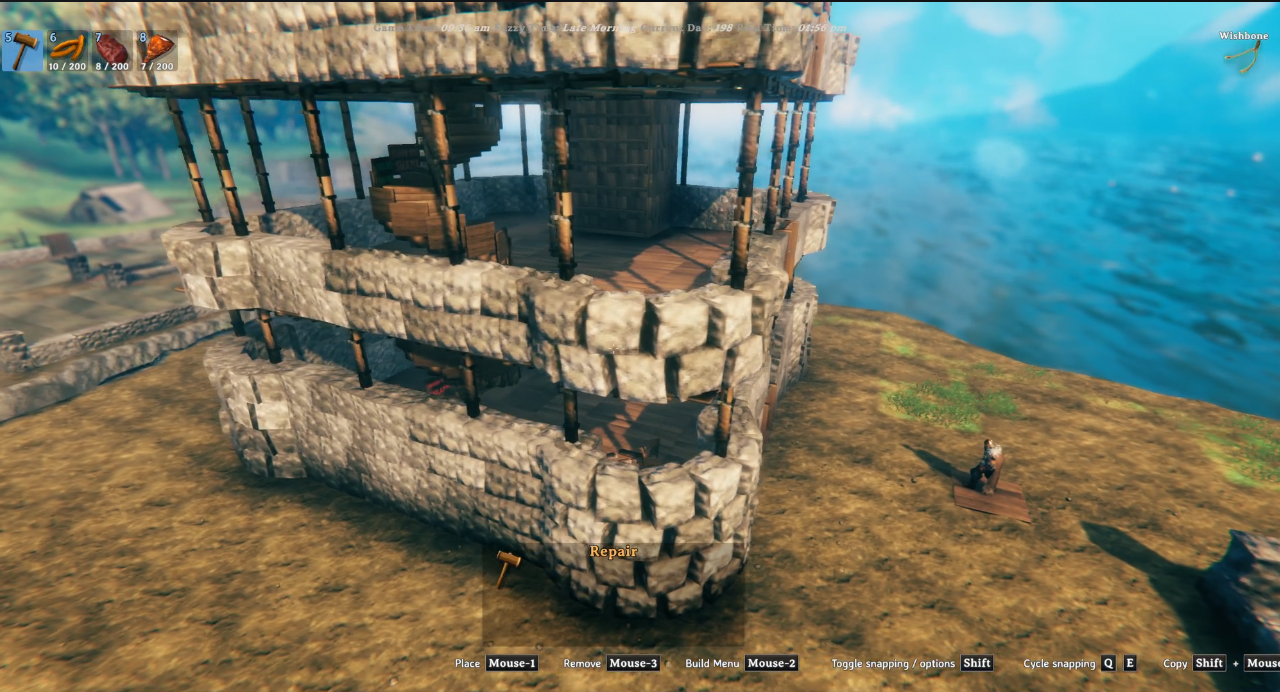
The Designer supports up to three in-memory level layouts with quick switching, per-level overlay rendering, and cross-level clash hints so you can plan multi-storey builds before committing a single piece. Orientation-sensitive tools — including Beds, Workbenches, and Staircases — show directional arrows so what you see in the Designer matches exactly what gets built in-game. The FlexiWall tool lets you draw curved stone walls of any shape — arcs, sweeping curves, and full circles — that are not constrained to the rectangular grid.
Excel-style row/column reference labels run along all four edges of the grid to help with precise placement, and furniture pieces (Bed, Staircase, Hearth, Workbench) show a small centre handle once placed — drag it to move the piece, click it to select it, then rotate in place with the arrow keys or mouse wheel. Right-click and Escape simply cancel whatever's active (tool, selection, or in-progress draw) without deleting anything; to remove a piece, hover it and press Delete/Backspace.
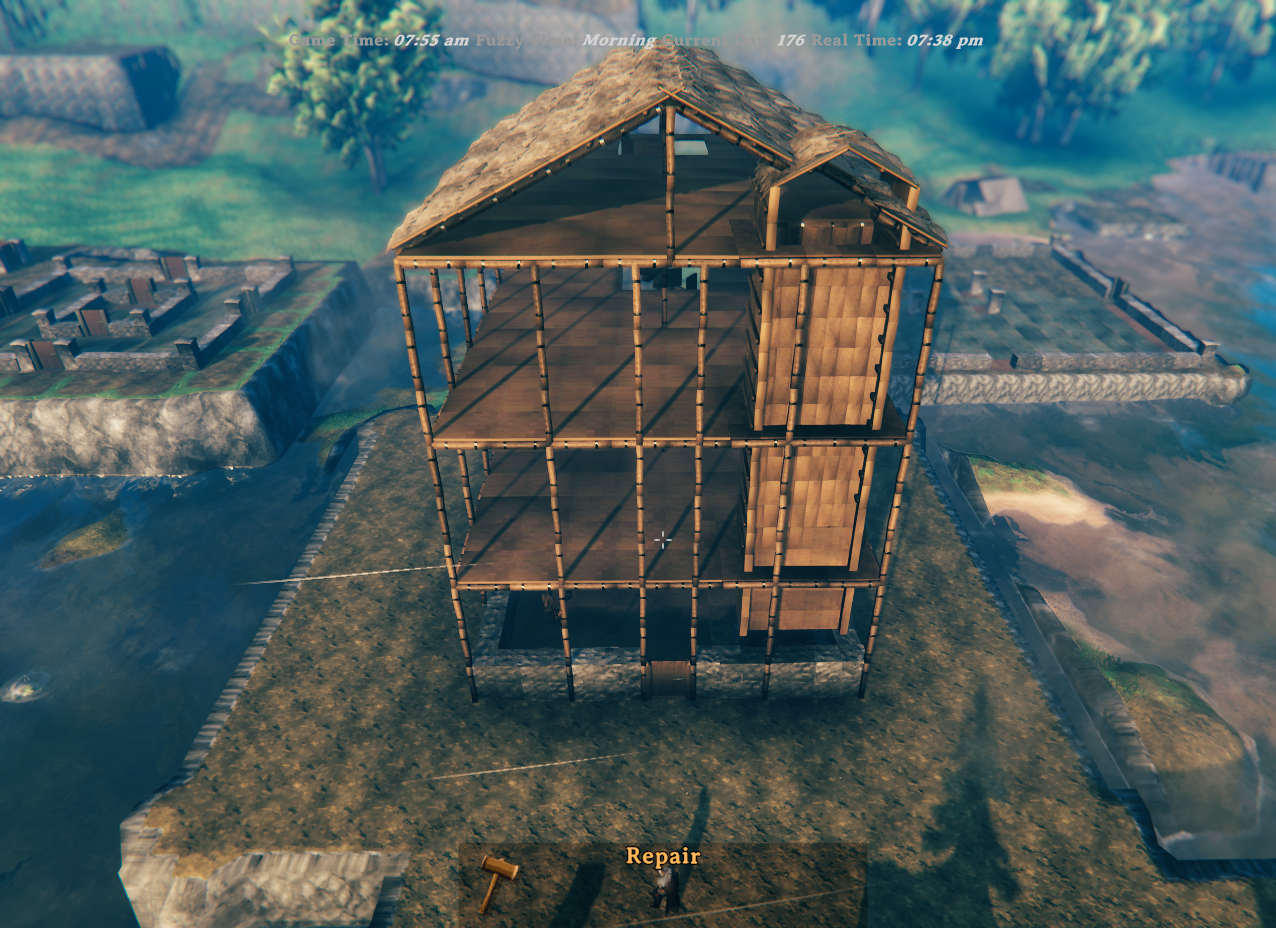
Once you're happy with the design, press the build hotkey, position the preview in-world, and confirm. The mod levels the terrain, places every piece in the right order, and handles scaffold framing for upper floors automatically. For multi-level builds, additional red floating rectangles appear in the preview at each upper-floor height so you can see the full vertical footprint before committing. If something is off, undo restores both pieces and terrain in one keypress — or use the keep-terrain undo (Ctrl+F9) to remove pieces while leaving the levelled ground intact.
This package includes two components:
- ValheimFloorPlan mod — a BepInEx plugin that reads
.vfpplan files and builds them in-game. - Valheim Floor Plan Designer — a browser-based app (included) for creating and editing
.vfpplan files.
Demo video: https://youtu.be/jz39KSSfhJ0
Join the community on Discord: https://discord.gg/ex2HNJAc — share screenshots of your builds, ask questions, and see what others have created with Valheim Floor Plan.
Included in this package:
- The mod DLL (installed automatically under
BepInEx/plugins) - The Designer web app (
BepInEx/plugins/ValheimFloorPlan/Designer/) - Sample
.vfpplans to get started immediately
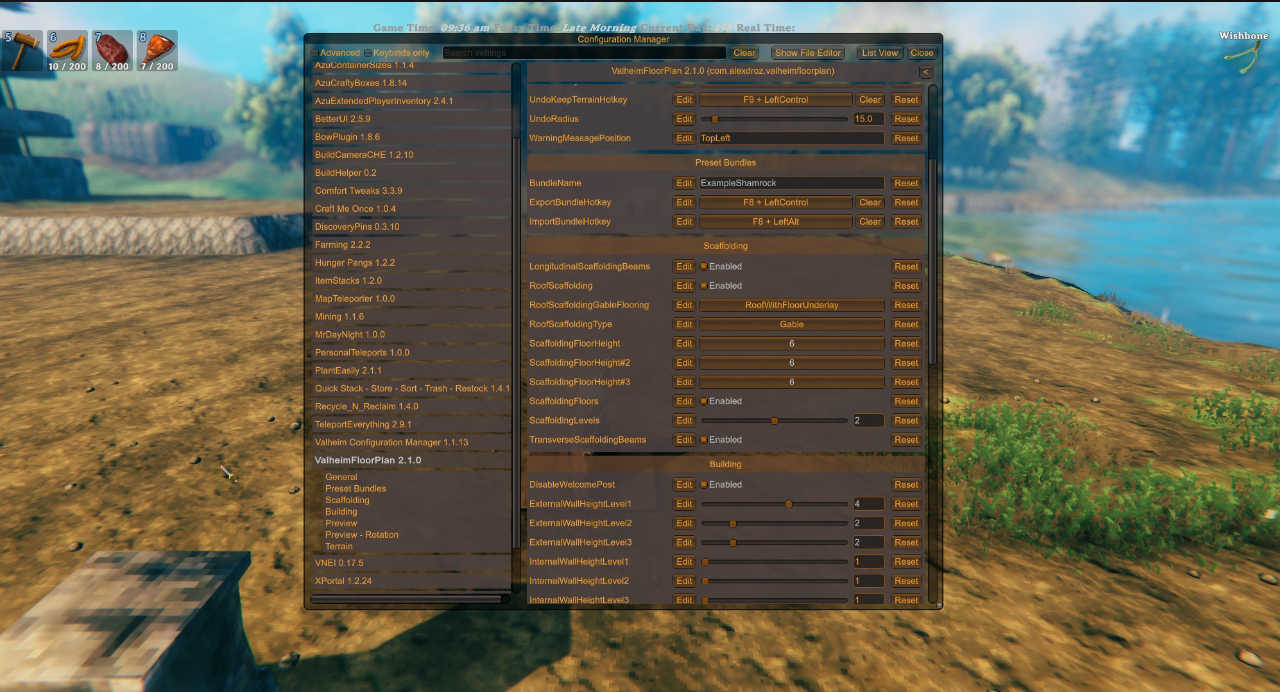
In-Game Configuration Panel
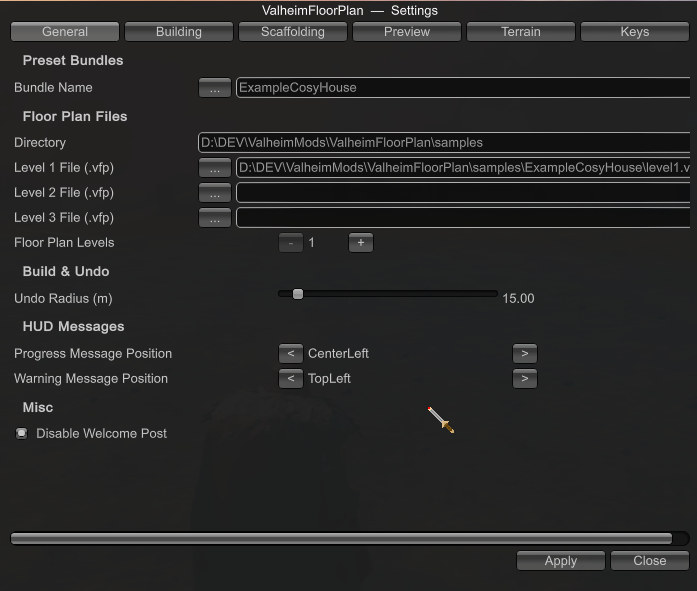
Press Shift+F8 at any time during a game session to open the settings panel. All mod options are available from here — no need to edit the .cfg file manually for most settings.
The panel has six tabs:
| Tab | What it covers |
|---|---|
| General | Load a preset bundle via the file browser; set Level 1/2/3 floor plan file paths via the file browser; number of levels, undo radius, HUD message positions, welcome post toggle |
| Building | Wall/pillar material, external and internal wall heights per level, staircase reach mode and step settings |
| Scaffolding | Roof scaffolding, open top, roof style, gable flooring, scaffold levels, floor heights per level, floors and beam toggles |
| Preview | Forward offset, move step, fine move step, coarse/fine/build rotation snaps |
| Terrain | Levelling passes, spike cleanup passes, stamp radius, high-point delta, staged raise settings |
| Keys | Read-only reference for all hotkeys and preview key bindings |
Each floor plan file field and the Bundle Name field include a [...] browse button that opens a draggable file picker. The picker supports directory navigation and filters to .vfp or .vpfset files as appropriate. Selecting a bundle file performs a full import — all settings and the three floor plan file paths are updated immediately and reflected in the panel.
Changes take effect when you click Apply or Close — values are written directly to the BepInEx config file. Mouse, keyboard, and camera input are fully blocked from the game while the panel is open so nothing bleeds through.
Hotkeys are shown read-only in the Keys tab and cannot be rebound from within the panel. To rebind a hotkey, edit the BepInEx .cfg file directly. The panel hotkey itself defaults to Shift+F8 and is configurable via ConfigPanelHotkey in the .cfg file.
Creating Floor Plans
-
Open the Designer to create or edit a plan. It is a local web page installed by Thunderstore Mod Manager. Copy the path below and paste it into your browser address bar to open it:
%APPDATA%\Thunderstore Mod Manager\DataFolder\Valheim\profiles\Default\BepInEx\plugins\RetiredCoders-ValheimFloorPlan\ValheimFloorPlan\Designer\index.html e.g. C:\Users\{Username}\AppData\Roaming\Thunderstore Mod Manager\DataFolder\Valheim\profiles\Default\BepInEx\plugins\RetiredCoders-ValheimFloorPlan\ValheimFloorPlan\Designer\index.html -
Save/export a
.vfpfile. -
Point the mod config
FloorPlanFileto that.vfpfile. -
In game, press the build hotkey (default F8) and place the design. A terrain snapshot is taken automatically before placement.
While the preview is active, use these keys to adjust placement:
Key Action ↑↓←→Move the plan forward / backward / left / right QRotate left (default coarse step: 90°) GRotate right (default coarse step: 90°) Left Shift(hold)Fine-adjust mode — smaller move/rotate steps EConfirm and build at current position RMB/EscapeCancel placement Note: All keys are configurable in the BepInEx config file.
Rotation note: confirmed builds snap to
BuildRotationSnapDegrees(default90°) so the finished structure stays aligned to angles that still work with Valheim's normal manual piece snapping. Fine preview rotation uses22.5°steps by default.The rotation-related config entries live together in the
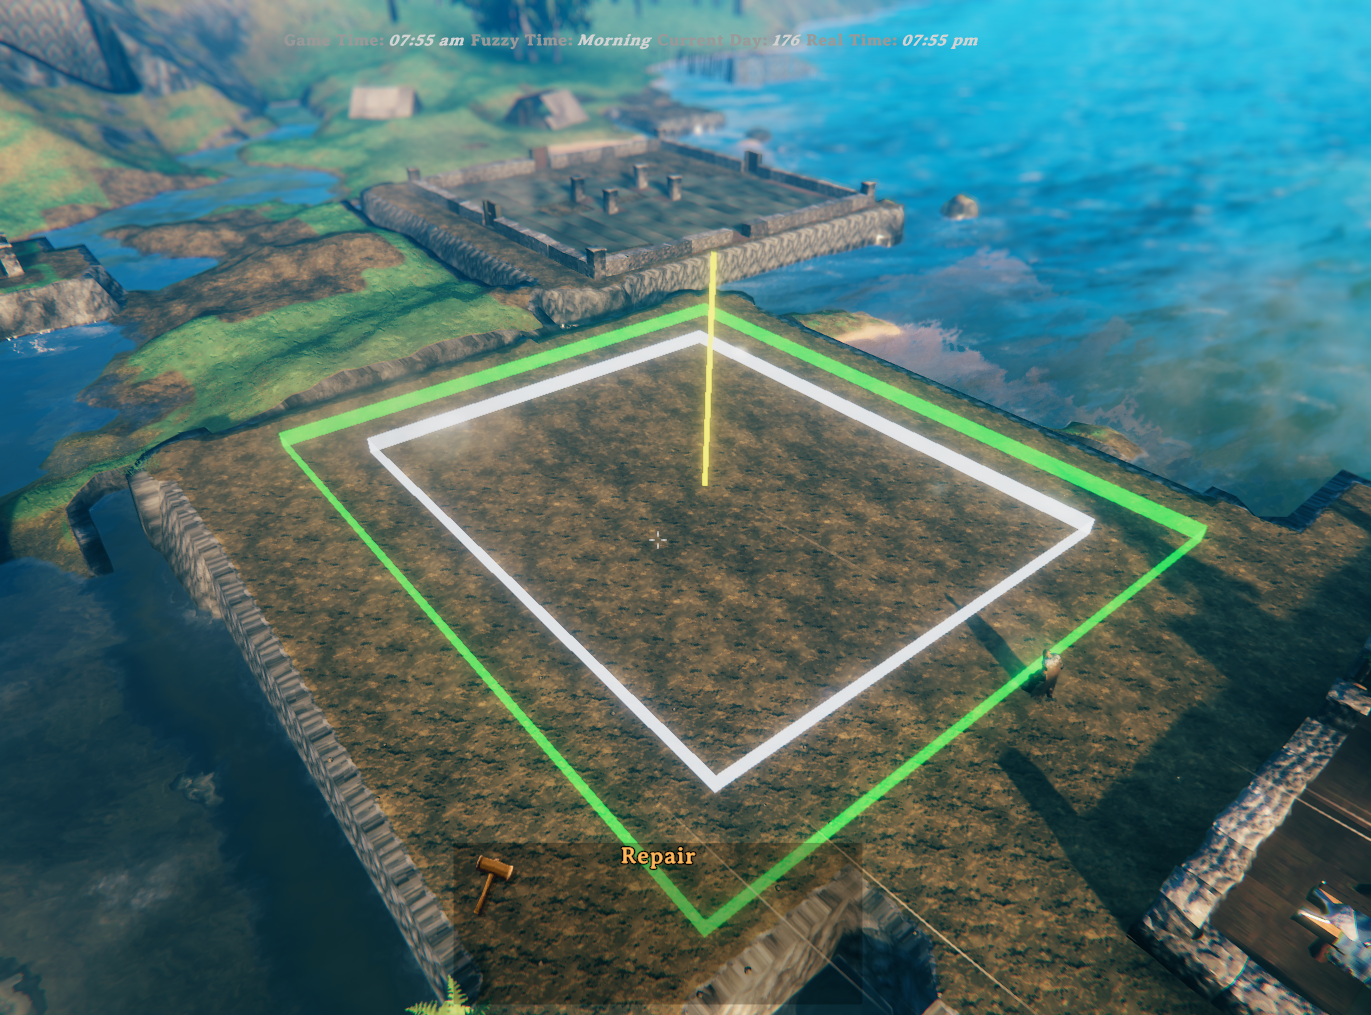
Preview - Rotationsection.While positioning the plan, watch for these visual markers in the world:
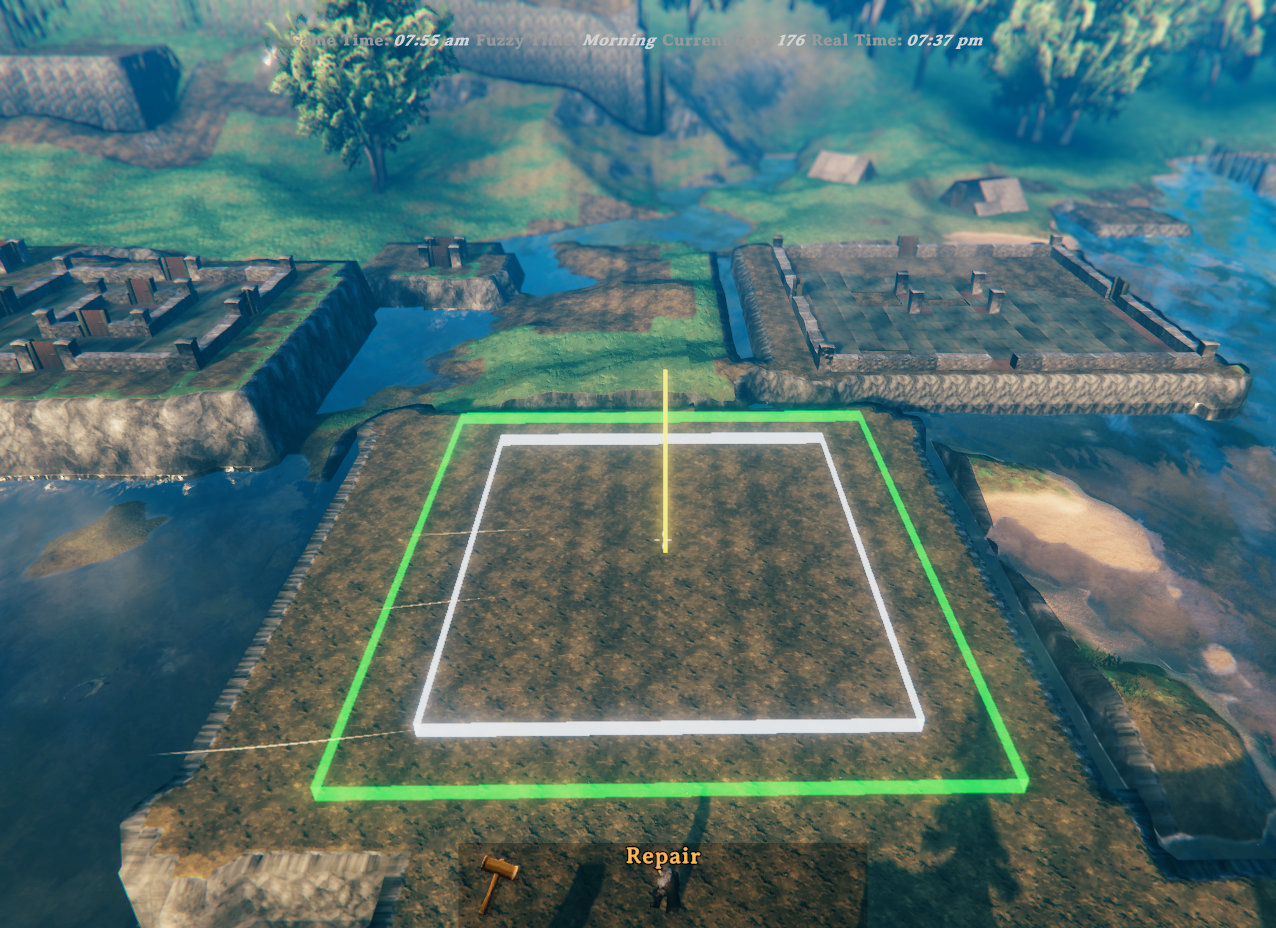
- White rectangle — the inner levelled pad: the exact area of ground that will be raised and flattened to sit your foundation on.
- Green rectangle — the outer terrain-change boundary: terrain blending extends to this edge, giving a smooth transition rather than a hard cliff.
- Red floating rectangle(s) — upper-floor level bands (multi-level builds only). One red band appears per upper floor at its expected scaffold height, so you can see the full vertical footprint before confirming. Only shown when
FloorPlanLevelsis2or3. - Tall yellow flagpole — the exact placement origin point at the centre of the plan. The pole rises 10 m above the terrain surface so it remains visible even when the ground is underwater or underground.
- Orange diamond markers — terrain edge risk warnings. These appear when the surrounding terrain is uneven enough that the levelled edge may produce visible tears or spikes. Move or rotate the plan until they disappear (or reduce) for the cleanest result. Markers turn red when risk is high.
Note: A HUD message also reports the current risk level (
LOW/MEDIUM/HIGH) along withstep(the steepest cross-edge height jump) andrelief(total height range around the footprint) to help you judge whether to nudge the plan before building. -
To undo, press the undo hotkey (default F9). A 5-second confirmation window opens showing:
- Red rings around every VFP piece within the search radius so you can see exactly what will be removed.
- Orange boundary circle on the ground marking the edge of the search radius.
Optional mode: press Ctrl+F9 (configurable via
UndoKeepTerrainHotkey) to start piece-only undo that keeps the levelled terrain. In this mode the terrain snapshot is discarded instead of restored.During the confirmation window you can:
Key Action ↑↓←→Move the search circle centre to target different pieces. Movement respects camera angle. Hold Left Shiftfor fine movement.+/-(or numpad)Increase / decrease the search radius by 5 m. The new radius is saved to config. F9(undo hotkey again)Confirm normal undo — removes all marked pieces and restores terrain. Ctrl+F9(UndoKeepTerrainHotkey)Start or confirm keep-terrain undo — removes marked pieces and discards the current terrain snapshot. If started with Ctrl+F9, confirmation can be done with eitherCtrl+F9orF9.RMB/EscapeCancel — clears all highlights without removing anything. The HUD message shows the current radius and remaining time throughout the window. All adjustments (movement or radius) restart the 5-second confirmation timer.
IMPORTANT: Terrain can only be restored within the current session — if you leave the area or reload, the terrain snapshot is lost. Building pieces can be undone across sessions because they are tagged as built by Valheim Floor Plan.
Tip — keep the levelled terrain: if you want to remove your build but keep the flat ground (e.g. to iterate on a design), use Ctrl+F9 (UndoKeepTerrainHotkey) instead of F9. Pieces are removed as normal, but the terrain snapshot is discarded rather than restored.
FlexiWall Tool
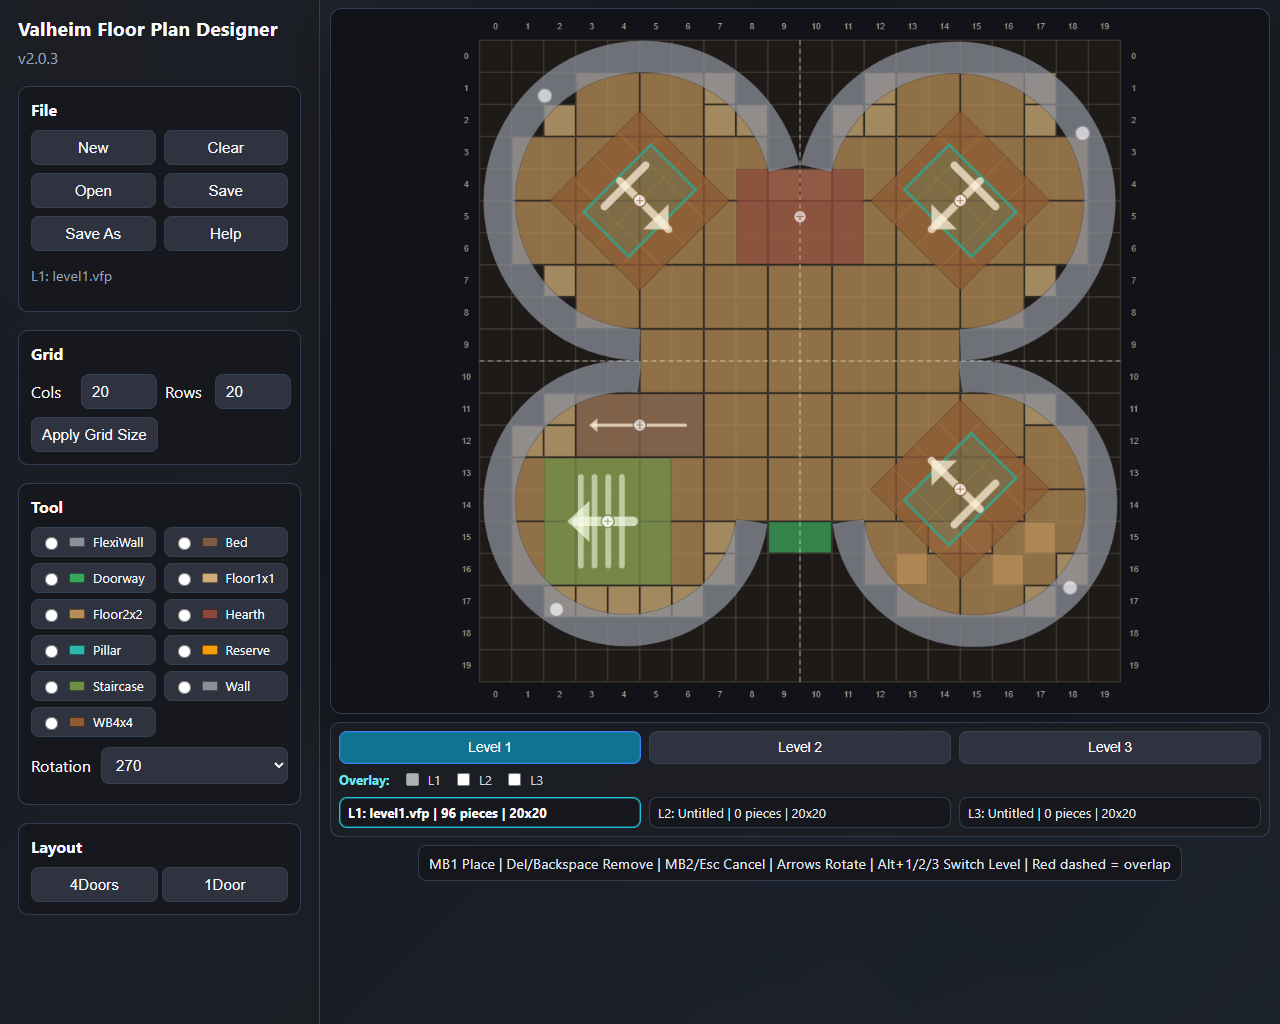
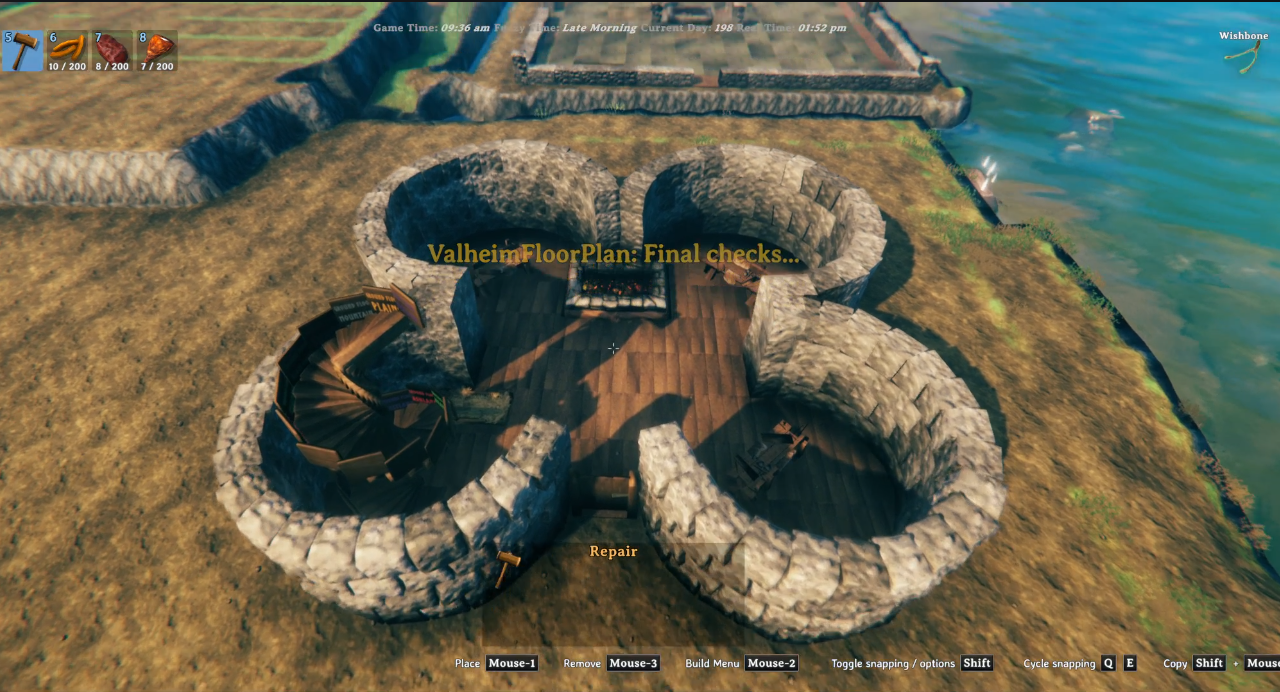
The FlexiWall tool draws curved or straight walls along any path in the Designer. Walls are built in-game as stacked stone pieces following the arc, with the same brick-bond row offset as regular walls.
| Designer layout | In-game result |
|---|---|
 |
 |
FlexiWall Examples video: https://youtu.be/N8CvcGpX-BQ
Drawing a FlexiWall
- Select the FlexiWall tool from the piece selector.
- Click a start cell — a green dot appears to confirm the start position.
- Click an end cell — a straight wall preview appears between the two cells.
- Drag the midpoint handle (white circle) to bend the wall into a curve. The arc updates live as you drag.
To remove a placed FlexiWall, click its midpoint handle to select it (shown with a dashed outline, just like furniture pieces), then press Delete or Backspace — you don't need the FlexiWall tool active to do this.
Endpoint snapping
FlexiWall endpoints snap to the cell-edge boundary that is tangential to the arc at that point, rather than to the cell centre. This means two FlexiWalls that share a cell boundary will meet at exactly the same world coordinate — no gap in the build.
Green and red dots on placed walls show the exact snapped start and end positions so you can see where each wall begins and ends.
Closing a circle
To build a complete ring, place the start and end cells adjacent to each other (one cell apart), then drag the midpoint handle to the opposite side of the circle. The Designer will draw a closed ring and the builder will produce a full circle of wall pieces.
For very large circles, or if you want separate arcs with a doorway gap, you can use two FlexiWalls end-to-end.
FlexiWalls in multi-level builds
FlexiWalls work in Level 1, Level 2, and Level 3 plan files. Upper-level FlexiWalls are placed at the correct scaffold-deck height alongside other upper-level pieces. The footprint validation and terrain levelling area both include FlexiWall extent, so a plan containing only FlexiWalls (no regular grid pieces) still produces a correct build preview and levelled pad.
Preset Bundle Workflow (In Game)
Preset bundles let you share/reload a complete setup: Level 1/2/3 .vfp files plus non-key build/config values.
- Bundle format:
.vpfset(zip container) - Bundle output folder:
BepInEx/plugins/RetiredCoders-ValheimFloorPlan/ValheimFloorPlan/PresetBundles/by default. IfFloorPlanDirectoryis set, bundles are exported to and imported from that folder instead. - Key mappings are intentionally not included in exported/imported bundle settings.
Note: when a bundle is imported, the extracted .vfp files are written into a subfolder named after the bundle inside the bundle output folder, and FloorPlanFile/FloorPlanFileLevel2/FloorPlanFileLevel3 are updated to those full extracted paths. If you are using FloorPlanDirectory, you may want to move the extracted files into your directory and update the file fields to bare filenames afterwards.
Default controls:
| Key | Action |
|---|---|
Ctrl+F8 (ExportBundleHotkey) |
Export current setup as a new timestamped bundle named <BundleName>-YYYYMMDD-HHMMSS.vpfset. |
Alt+F8 (ImportBundleHotkey) |
Start timed import selection mode. |
Right Arrow / Left Arrow |
While import selection is active, move to next/previous bundle. |
Enter |
Import currently selected bundle. |
Escape |
Cancel import selection. |
While import selection is active, the HUD shows:
- Selected bundle name
- Current position as
bundle X of N - Control hints (
Right,Left,Enter,Escape) - Remaining time
If the timer expires, import selection is cancelled automatically.
After a successful import, BundleName is automatically normalized to the imported preset prefix (timestamp suffix removed).
How Multi-Level Builds Work (Plain Language)
When FloorPlanLevels is set to 2 or 3, the mod builds one level at a time.
For each upper level, it follows this order:
- Place route-critical pieces first (staircases and hearths).
- Cut/preserve needed vertical paths (stair shafts and chimney shafts).
- Place the rest of that level's pieces around those paths.
This helps avoid the "nothing gets built" situation where pieces can block each other if placed in the wrong order.
What gets blocked
- Higher-level pieces are blocked from occupying protected stair/chimney shaft space.
- Clash checks are primarily local to the current level, but shaft routes are kept clear across levels.
- Upper-level duplicate floor tiles from plan files are skipped where scaffold decks already provide flooring.
If something is skipped
- You get HUD/log warning categories that explain why.
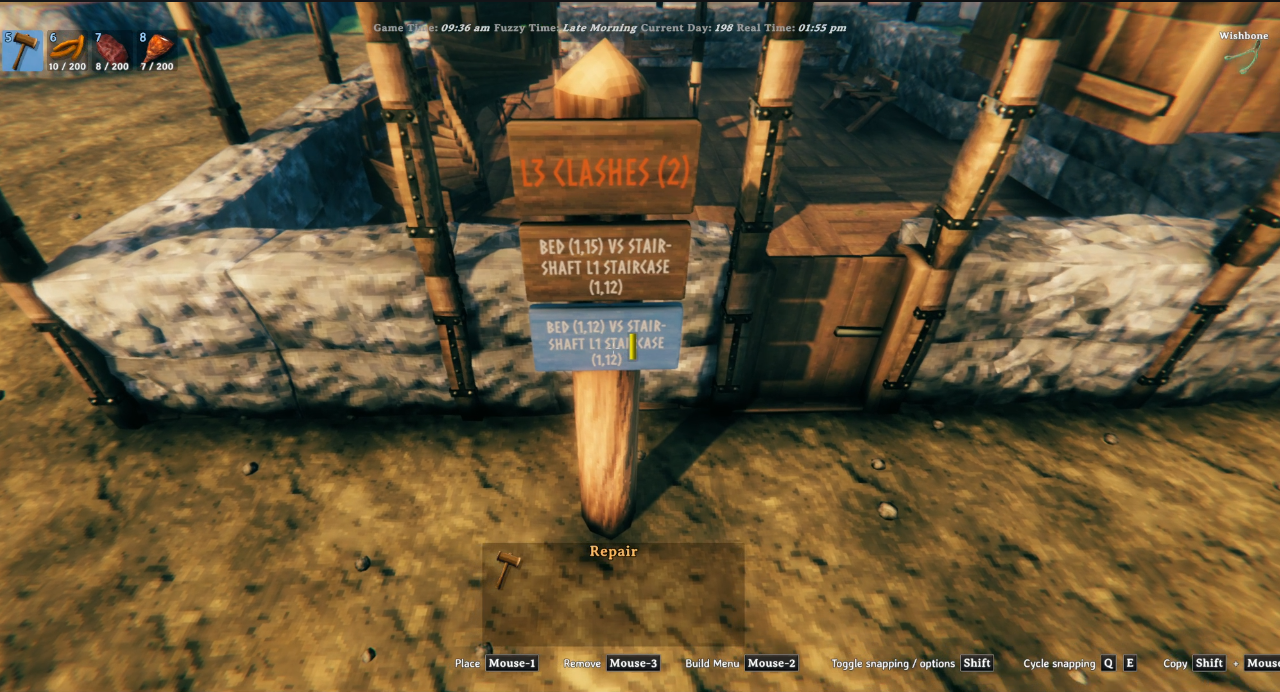
- If a level has clashes, the build creates a clash signpost for that level with detail signs (plus log details for overflow).
Config Options
All values below are configurable in the BepInEx config file.
General
| Option | Default | Allowed values | What it does |
|---|---|---|---|
FloorPlanDirectory |
(empty) | Any valid folder path | Optional base folder for .vfp files and preset bundles. When set, FloorPlanFile, FloorPlanFileLevel2, and FloorPlanFileLevel3 can be bare filenames instead of full paths, and bundle export/import uses this folder instead of the default PresetBundles subfolder. Existing configs with full absolute paths in the file fields continue to work unchanged. |
FloorPlanFile |
(empty) | File path or bare filename | Path to the .vfp file exported by the Designer. A bare filename (e.g. myhouse.vfp) is sufficient when FloorPlanDirectory is set; otherwise provide the full path. |
FloorPlanLevels |
1 |
1 to 3 |
Number of layout levels to build. 1 uses only FloorPlanFile, 2 also uses FloorPlanFileLevel2, 3 also uses FloorPlanFileLevel3. Values above 1 enforce multi-level scaffolding requirements. |
FloorPlanFileLevel2 |
(empty) | File path or bare filename | Optional Level 2 .vfp file. A bare filename is sufficient when FloorPlanDirectory is set. If set, its footprint must fit within the Level 1 (FloorPlanFile) footprint. |
FloorPlanFileLevel3 |
(empty) | File path or bare filename | Optional Level 3 .vfp file. A bare filename is sufficient when FloorPlanDirectory is set. If set, its footprint must fit within the Level 1 (FloorPlanFile) footprint. |
BuildHotkey |
F8 |
Any valid KeyboardShortcut |
Starts plan preview/build flow. |
UndoHotkey |
F9 |
Any valid KeyboardShortcut |
Removes placed VFP-tagged pieces and restores terrain snapshot. |
UndoKeepTerrainHotkey |
LeftControl + F9 |
Any valid KeyboardShortcut |
Starts piece-only undo mode: removes VFP pieces and discards the current terrain snapshot so levelled terrain remains. |
BundleName |
MyBuild |
Any valid file-name text | Preset name prefix used when exporting bundles. Export file name format is <BundleName>-YYYYMMDD-HHMMSS.vpfset. After import, this is reset to the imported prefix (timestamp removed). |
ExportBundleHotkey |
LeftControl + F8 |
Any valid KeyboardShortcut |
Exports a preset bundle to PresetBundles as <BundleName>-YYYYMMDD-HHMMSS.vpfset (layout files + non-key settings). |
ImportBundleHotkey |
LeftAlt + F8 |
Any valid KeyboardShortcut |
Starts timed bundle import selection mode (Right/Left choose, Enter import, Escape cancel, auto-timeout cancel). |
ConfigPanelHotkey |
LeftShift + F8 |
Any valid KeyboardShortcut |
Toggles the in-game configuration panel. See In-Game Configuration Panel. |
UndoRadius |
15 |
5 to 150 |
Search radius in metres around the undo circle centre when scanning for VFP pieces to remove on Undo. Adjustable live during the confirmation window with +/-, and circle centre is adjustable with arrow keys. |
ProgressMessagePosition |
CenterLeft |
Valheim MessageHud positions (Center, TopLeft, TopRight, etc.) |
HUD slot for build-progress messages. CenterLeft is accepted as an alias and maps to Center. |
WarningMessagePosition |
TopLeft |
Valheim MessageHud positions (Center, TopLeft, TopRight, etc.) |
HUD slot for warnings/risk messages. CenterLeft is accepted as an alias and maps to Center. |
Building
| Option | Default | Allowed values | What it does |
|---|---|---|---|
ExternalWallHeightLevel1 |
1 |
1 to 6 |
Stacks Level 1 outer-perimeter Wall/Pillar pieces vertically. Dynamic cap: ScaffoldingFloorHeight x 2. |
ExternalWallHeightLevel2 |
1 |
1 to 6 |
Stacks Level 2 outer-perimeter Wall/Pillar pieces vertically. Dynamic cap: ScaffoldingFloorHeight#2 x 2. |
ExternalWallHeightLevel3 |
1 |
1 to 6 |
Stacks Level 3 outer-perimeter Wall/Pillar pieces vertically. Dynamic cap: ScaffoldingFloorHeight#3 x 2. |
InternalWallHeightLevel1 |
1 |
1 to 6 |
Stacks Level 1 interior FlexiWall pieces vertically (walls whose control points do not touch the layout perimeter). |
InternalWallHeightLevel2 |
1 |
1 to 6 |
Stacks Level 2 interior FlexiWall pieces vertically. |
InternalWallHeightLevel3 |
1 |
1 to 6 |
Stacks Level 3 interior FlexiWall pieces vertically. |
WallPillarMaterial |
Stone |
Stone, Wood |
Chooses material set used for Wall and Pillar types. |
StaircaseReachMode |
ToTheNextLevelOnly |
ToTheNextLevelOnly, AllTheWay |
Controls staircase vertical reach. ToTheNextLevelOnly climbs one level at a time. AllTheWay climbs toward the highest available scaffold level. |
StaircaseStepRise |
0.16 |
0.10 to 0.40 |
Vertical height in metres between staircase treads. Lower values produce shallower, easier-to-climb steps but increase total tread count. |
StaircaseStepAngleDeg |
15 |
10 to 30 |
Degrees of rotation between staircase treads. Lower values produce a wider, gentler spiral. |
StaircaseStepRadius |
0.75 |
0.50 to 1.00 |
Distance in metres from the centre pole to the midpoint of each tread. Keep at or below 1.0 to stay within the 4×4 staircase footprint. |
Scaffolding
| Option | Default | Allowed values | What it does |
|---|---|---|---|
RoofScaffolding |
false |
true / false |
Adds scaffold poles and perimeter beams around the plan during the build. Automatically forced to true when FloorPlanLevels > 1. |
RoofStyle |
Gable |
Gable, Flat |
Topmost scaffold deck shape when ScaffoldingFloors is enabled and OpenTop is false. Gable builds a pitched roof layout and extends front-mid/back-mid/centre support columns up to the apex. Flat tiles the topmost level with ridge roof pieces edge-to-edge (one piece per 2x2 tile area). |
OpenTop |
false |
true / false |
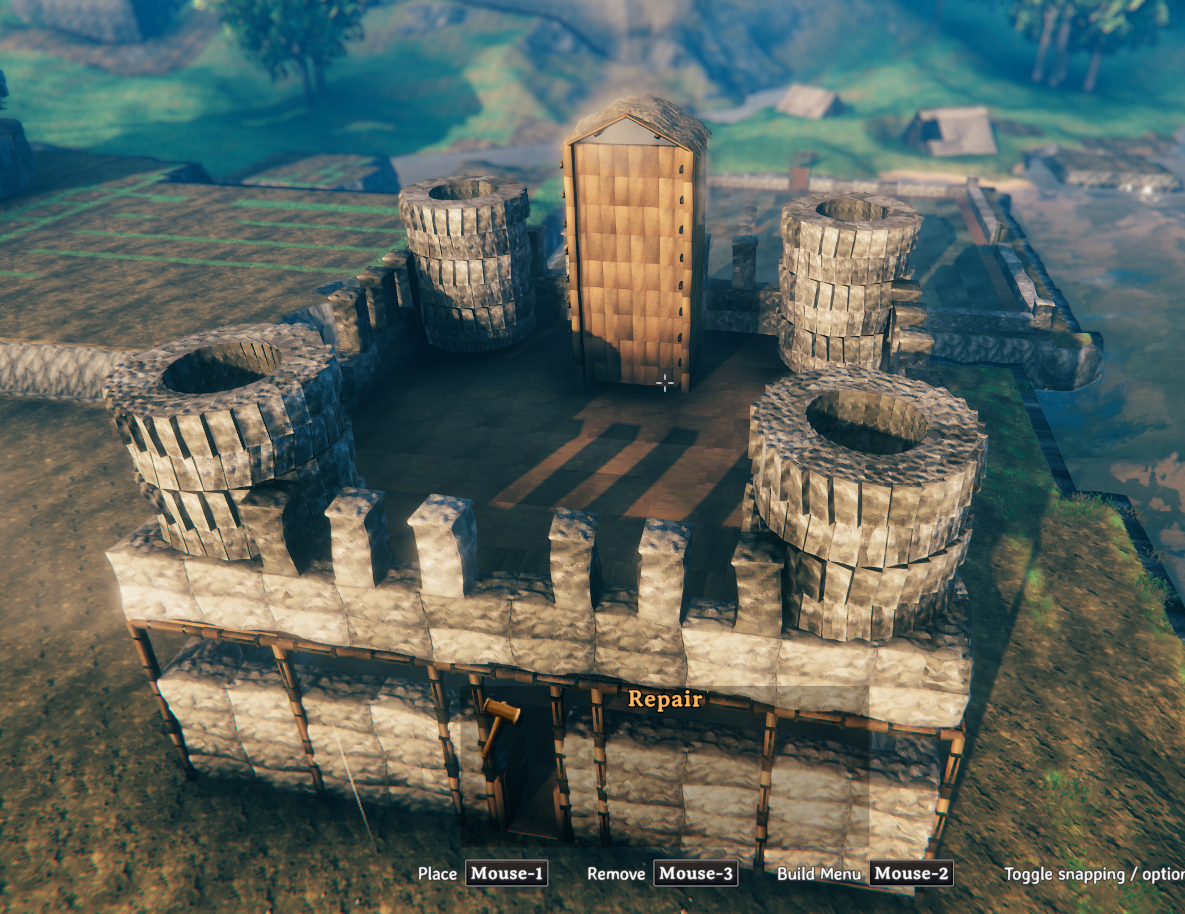
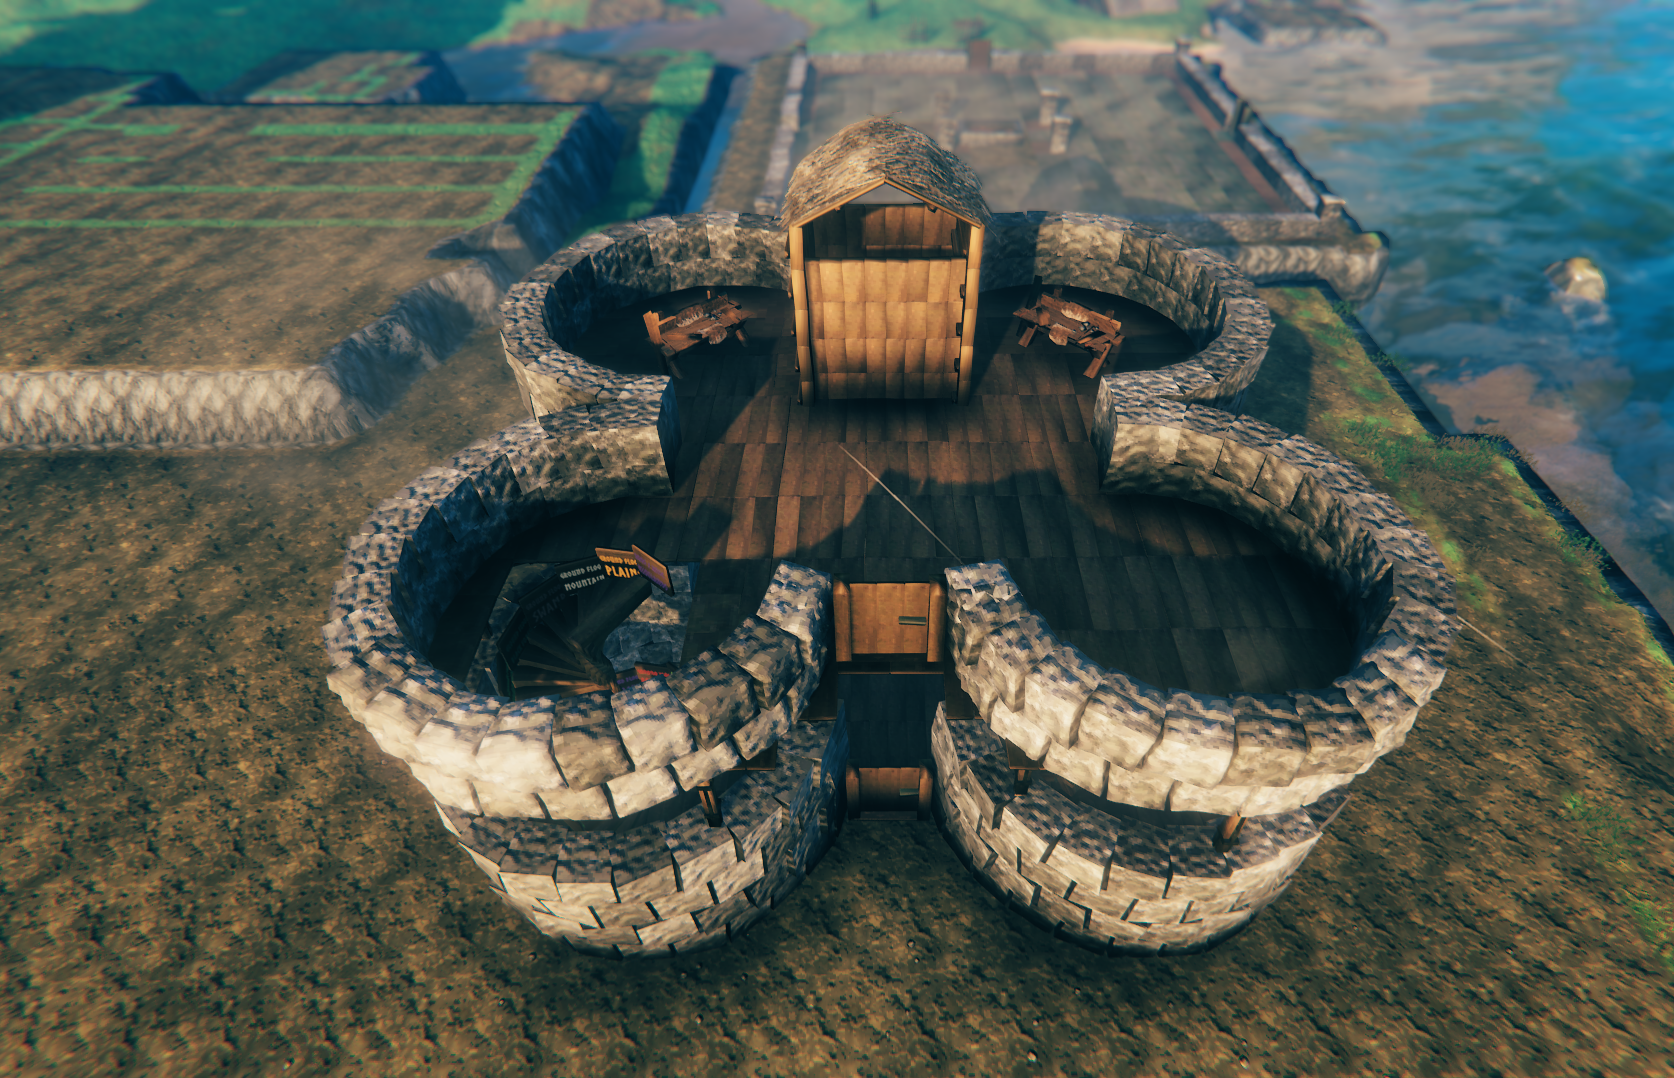
When true, the topmost scaffold level is left open to the sky — no roof deck, beams, or vertical scaffolding on the external walls of the topmost level, regardless of ScaffoldingFloors or RoofStyle. Hearth chimneys still rise through the open level. Staircases are clamped to the highest real floor deck. |
RoofScaffoldingGableFlooring |
RoofWithFloorUnderlay |
RoofWithFloorUnderlay, RoofOnly |
Gable-only top-surface behavior (used only when RoofStyle=Gable). RoofWithFloorUnderlay places floor tiles under the top gable roof. RoofOnly places only gable roof pieces. |
ScaffoldingLevels |
1 |
1 to 3 |
Number of stacked scaffolding levels when RoofScaffolding is enabled. Each extra level repeats the same scaffold pattern +4m above the previous level. |
ScaffoldingFloorHeight |
4 |
2, 4, 6 |
Vertical height in metres between scaffold levels. Must be a multiple of 2m so stacked wood-iron support segments line up correctly. |
ScaffoldingFloorHeight#2 |
4 |
2, 4, 6 |
Vertical height in metres for the second scaffold level. Used when ScaffoldingLevels is 2 or 3. |
ScaffoldingFloorHeight#3 |
4 |
2, 4, 6 |
Vertical height in metres for the third scaffold level. Used when ScaffoldingLevels is 3. |
ScaffoldingFloors |
false |
true / false |
Builds wood floor decks across each scaffolding level when RoofScaffolding is enabled. Automatically forced to true when FloorPlanLevels > 1. |
TransverseScaffoldingBeams |
false |
true / false |
Adds west-to-east horizontal scaffold beams at each scaffold pole row. Automatically forced to true when FloorPlanLevels > 1. |
LongitudinalScaffoldingBeams |
false |
true / false |
Adds south-to-north horizontal scaffold beams at each scaffold pole column. Automatically forced to true when FloorPlanLevels > 1. |
Preview
| Option | Default | Allowed values | What it does |
|---|---|---|---|
BuildOriginForwardOffset |
0 |
0 to 20 |
Extra distance added to the auto-computed player-to-build-centre preview offset (metres). Usually not needed. |
MoveStep |
2.0 |
0.25 to 10.0 |
Nudge distance per move key press (metres). |
FineMoveStep |
0.5 |
0.05 to 5.0 |
Nudge distance per move key press while fine-adjust key is held (metres). |
Preview Keys
| Option | Default | What it does |
|---|---|---|
MoveForwardKey |
UpArrow |
Move preview centre forward relative to camera. |
MoveBackwardKey |
DownArrow |
Move preview centre backward relative to camera. |
MoveLeftKey |
LeftArrow |
Move preview centre left relative to camera. |
MoveRightKey |
RightArrow |
Move preview centre right relative to camera. |
RotateLeftKey |
Q |
Rotate preview counter-clockwise. |
RotateRightKey |
G |
Rotate preview clockwise. |
ConfirmKey |
E |
Confirm current preview placement and start build. |
CancelKey |
Escape |
Cancel preview. (Right-click cancels too.) |
FineAdjustKey |
LeftShift |
Hold for fine movement and fine rotation. |
Preview - Rotation
| Option | Default | Allowed values | What it does |
|---|---|---|---|
RotateStepDegrees |
90 |
22.5, 45, 90 |
Rotation applied per coarse rotate key press (degrees). |
FineRotateStepDegrees |
22.5 |
22.5, 45, 90 |
Rotation applied per rotate key press while fine-adjust key is held (degrees). |
BuildRotationSnapDegrees |
90 |
22.5, 45, 90 |
Snaps the final build rotation to the nearest allowed angle when preview starts and when build is confirmed. |
Terrain
| Option | Default | Allowed values | What it does |
|---|---|---|---|
TerrainLevelPasses |
2 |
1 to 5 |
Main levelling pass count before spike cleanup. Lower is faster; higher can smooth stubborn terrain. |
TerrainSpikeCleanupPasses |
2 |
1 to 5 |
Post-levelling spike cleanup pass count. |
TerrainStampRadius |
3.0 |
3.0 to 6.0 |
Radius of each terrain stamp disc (metres). Also controls outer terrain blend reach. |
TerrainHighPointDelta |
0.0 |
0.0 to 4.0 |
Extra height added to sampled highest point (targetY = highest + delta). |
TerrainUseStagedRaise |
false |
true / false |
Experimental staged vertical raise mode instead of single full-height raise. |
TerrainRaiseStepHeight |
0.5 |
0.15 to 1.5 |
Max vertical raise per stage when staged raise is enabled (metres). |
TerrainMaxRaiseStages |
1 |
1 to 16 |
Hard cap on number of staged raises when staged mode is enabled. |
TerrainSkipSatisfiedCenterStamps |
true |
true / false |
Skips center stamps where sampled terrain is already at/above target height. |
Sample Plans
The samples/ folder contains ready-to-use examples.
Blank starter grids:
samples/myfloorplan4x4.vfp,myfloorplan8x8.vfp,myfloorplan12x12.vfp,myfloorplan16x16.vfp,myfloorplan16x20.vfp,myfloorplan20x20.vfp,myfloorplan20x20_double.vfp,myfloorplan24x24.vfp,myfloorplan28x28.vfp— empty grids in common sizes
Preset bundles (.vpfset) — load with Alt+F8 in-game:
samples/ExampleRoundHouse.vpfset— three-level FlexiWall round house (20×20); level files:RoundHouse_Level_1/2/3_20x20.vfpsamples/ExampleCircular.vpfset— three-level circular FlexiWall build (20×20); level files:Circle_Level_1/2/3_20x20.vfpsamples/ExampleShamrock.vpfset— three-level shamrock multi-arc FlexiWall build (20×20); level files:Shamrock_Level_1/2/3_20x20.vfpsamples/ExampleShamrockGroundFloorOnly.vpfset— ground-floor-only shamrock layoutsamples/ExampleCosyHouse.vpfset— cosy home with beds, hearth, and workbenches; level files:CosyHome_Level_1_20x20.vfpsamples/ExampleHeart.vpfset— three-level heart-shaped FlexiWall build (20×20); level files:Heart_Level_1/2/3_20x20.vfpsamples/ExampleTurrets.vpfset— three-level build with FlexiWall turret towers (20×20); level files:Turrets_level_1/2/3_20x20.vfpsamples/ExampleCastle_2_Levels.vpfset— two-level castle keep with FlexiWall circular corner towers and battlements (20×20); level files:Castle_Level_1/2_20x20.vfpsamples/ExampleCastle_3_Levels.vpfset— three-level version of the castle keep; level files:Castle_Level_1/2/3_20x20.vfpsamples/ExampleThreeFloorBuild.vpfset— three-level rectangular build (16×20); level files:ThreeFloorBuild_Level_1/2/3_16x20.vfp
Standalone single-level plans:
samples/StarBase20x20.vfp— star-shaped base layoutsamples/RoundHouse.vfp— single-level FlexiWall round housesamples/Target.vfp— concentric-ring FlexiWall target layoutsamples/Turrets.vfp— single-level turret layoutsamples/Workbenches_16x20.vfp— 16×20 plan with workbenchessamples/Workbenches_and_Staircase_16x20.vfp— 16×20 with workbenches and staircasesamples/Workbenches_and_Staircase_ALT_16x20.vfp— alternate staircase placement
Tips
- Test away from world spawn. Terrain levelling and piece placement both depend on world-space coordinates. Builds near the origin (0, 0) can mask position-dependent bugs — always test in a realistic location.
- Building on already-levelled terrain is much quicker. Create a simple floor plan covering the area you want to build on. Run it once to level the ground, then portal away and back (this clears the terrain snapshot). Press F9 to remove the temporary build — the levelled terrain stays. Subsequent builds in the same area skip most of the levelling work and place pieces much faster.
- Watch the edge risk markers before confirming. Orange/red diamond markers appear when surrounding terrain is steep enough to cause tears or spikes. Nudging or rotating the plan a few metres is often enough to clear them.
- Rotate to align with the terrain slope. If one side of the pad is significantly higher, try rotating so the plan runs along the contour rather than across it — this reduces the height range the leveller has to span.
- Use the overlay in the Designer before building. Enable L2/L3 overlays to check for piece clashes across levels before saving any of the
.vfpfiles. Red dashed outlines flag conflicts, with directional rules for Staircases and Hearths. - Bed orientation matters. The arrow shown on a Bed in the Designer points toward the head. The in-game placement will match — players sleep with their head toward the arrow.
- Undo is session-only for terrain. The terrain snapshot is held in memory. Move to a different area or reload the world and it is gone. Piece removal still works across sessions because pieces are tagged.
- Use Ctrl+F9 to keep your levelled ground. If you want to remove the build and try again without re-levelling, press
Ctrl+F9instead ofF9to start undo. Pieces are removed but the levelled terrain stays. This is especially useful when iterating on a design in the same spot. - The preview shows all floor levels. When
FloorPlanLevelsis 2 or 3, floating red bands appear during preview at the height of each upper floor. Use them to check clearance and surroundings before confirming. - Adjust the undo radius before confirming. During the undo confirmation window,
+/-resizes the search circle and arrow keys reposition it. This is useful when two builds are close together and you only want to remove one. - FlexiWalls meet cleanly at shared cell boundaries. When two FlexiWalls share a cell boundary, their endpoints snap to the same edge midpoint, so there is no gap at the join. Use the green and red endpoint dots in the Designer to confirm the snap positions before saving.
- Use adjacent cells for a full circle. Select start and end cells that are one cell apart, then drag the midpoint handle to the far side of the ring. The Designer preview and the in-game build will both produce a closed circle.
- Use the row/column labels to place pieces precisely. The Designer prints numeric reference labels along all four grid edges, using the same 0-based numbering as the underlying
col/rowvalues and.vfpfile contents — handy for lining up pieces or cross-checking coordinates. - Reposition furniture without deleting it.
Bed,Staircase,Hearth, andWorkbenchpieces show a small handle at their centre once placed (or reloaded from a file). Drag the handle to move the piece, click it to select it, then use the arrow keys or mouse wheel to rotate it in place. PressEscapeor click elsewhere to deselect. - Right-click and Escape only cancel — they never delete. Both simply back out of whatever's active (an in-progress FlexiWall draw, a piece selection/drag, or the current tool) without removing any pieces, including FlexiWalls. To delete a piece, hover it and press
DeleteorBackspace— this also removes the currently selected piece (furniture or FlexiWall) if one is selected. - Deletion is scoped to the active tool's piece type. With the
Hearthtool selected,Delete/Backspacecan only removeHearthpieces — Floors, Walls, and other types under the cursor are left untouched. Switch tools (or select a placed piece via its handle, which switches the tool to match) to delete a different type. With no tool selected, any piece type can be removed. Delete/Backspaceworks as soon as you hover the grid — even right after picking a tool from the menu. Clicking a tool button no longer "traps" the shortcut; you can select a tool, hover over a placed piece of that type, and delete it immediately without first placing anything.- Hovering shows you exactly what
Delete/Backspacewould remove. The targeted piece — whether it's the top-most match under the cursor or your current selection — is outlined and tinted in red on the canvas, so there's never any guessing about what the next press of the key will do. - FlexiWalls are select-and-delete just like furniture. Click a placed FlexiWall's midpoint handle to select it (it gets the same dashed yellow outline as a selected furniture piece), then press
Delete/Backspaceto remove it. This works with any tool active — you don't need to switch to the FlexiWall tool first. While the FlexiWall tool is active, that same handle still drags to reshape the curve as before. - Multi-level plans must nest. Level 2 and Level 3 footprints must fit within the Level 1 footprint. If a level file is rejected at build time, check that all its pieces fall inside the Level 1 grid boundary.
- Scaffolding settings are forced on for multi-level builds. When
FloorPlanLevels > 1,RoofScaffolding,ScaffoldingFloors,TransverseScaffoldingBeams, andLongitudinalScaffoldingBeamsare all automatically enabled. You do not need to set them manually.
Feature Highlights
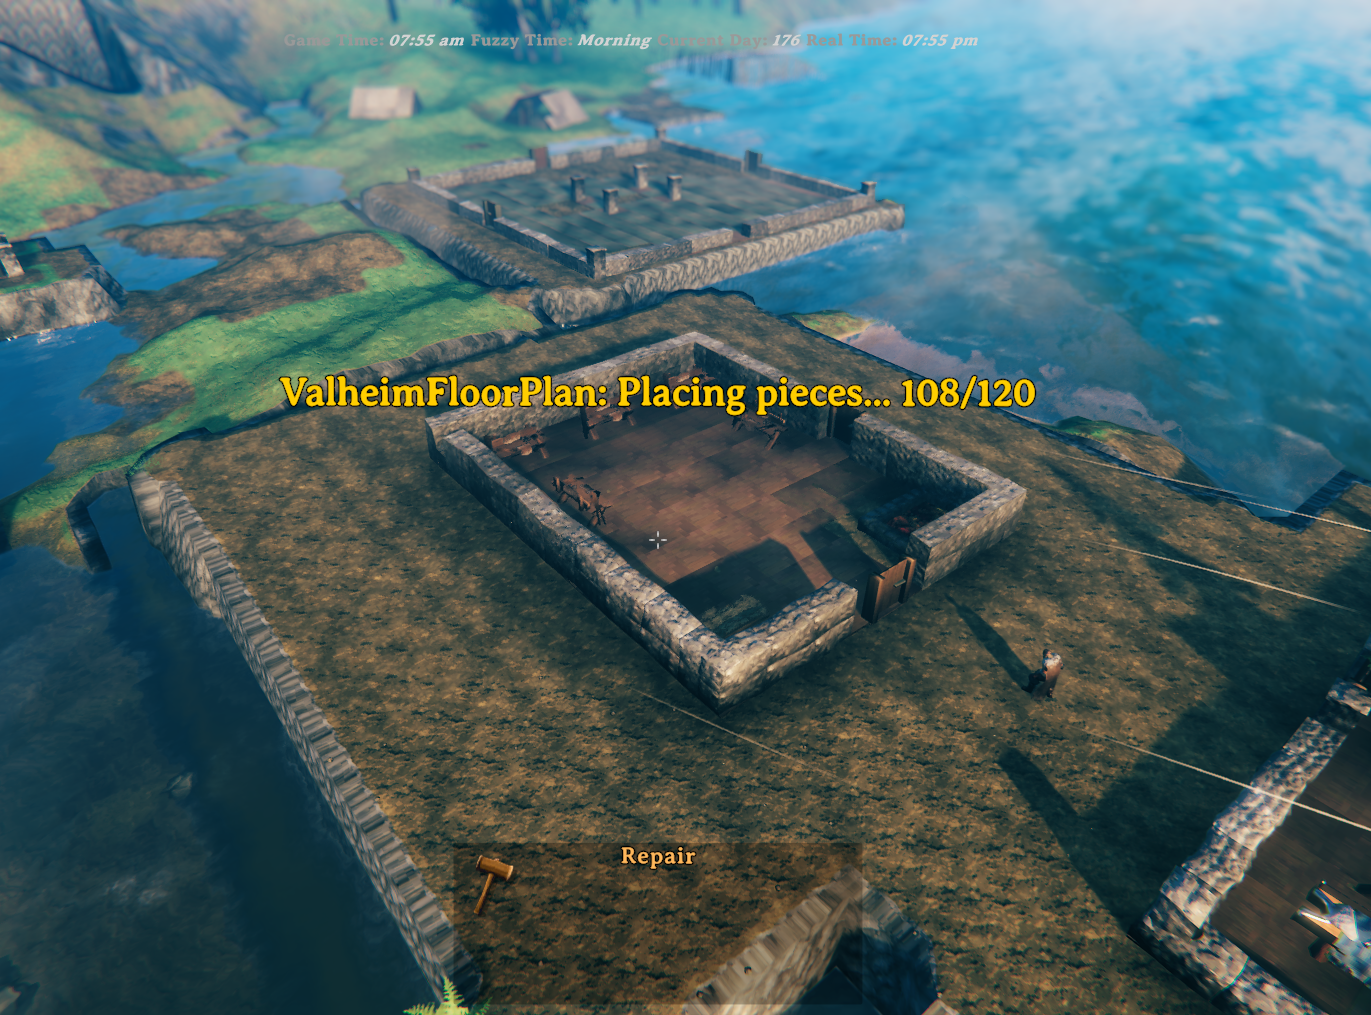
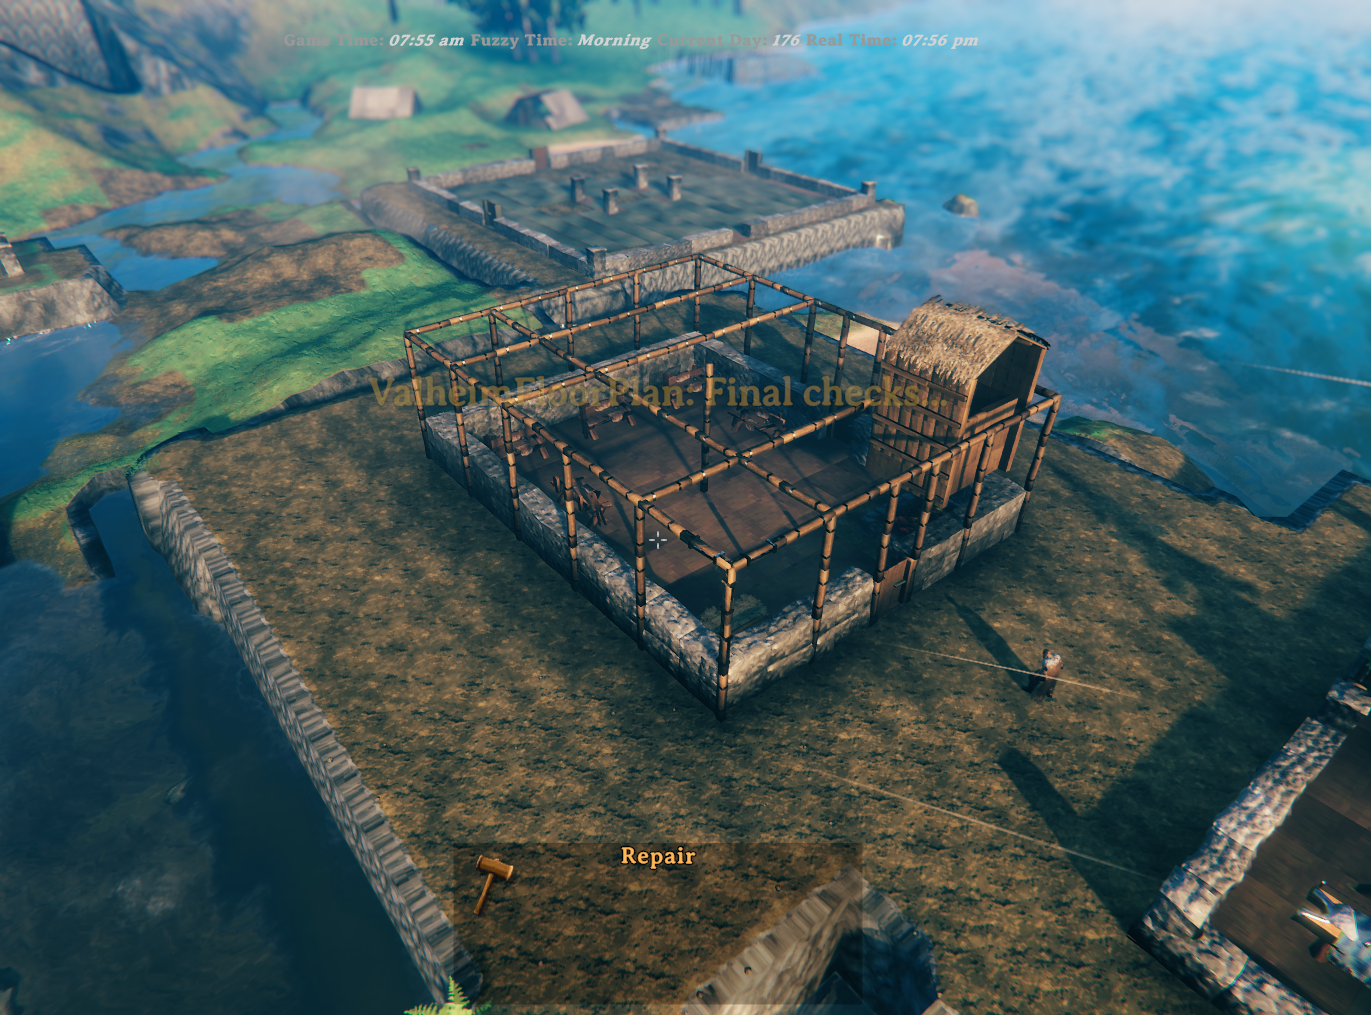
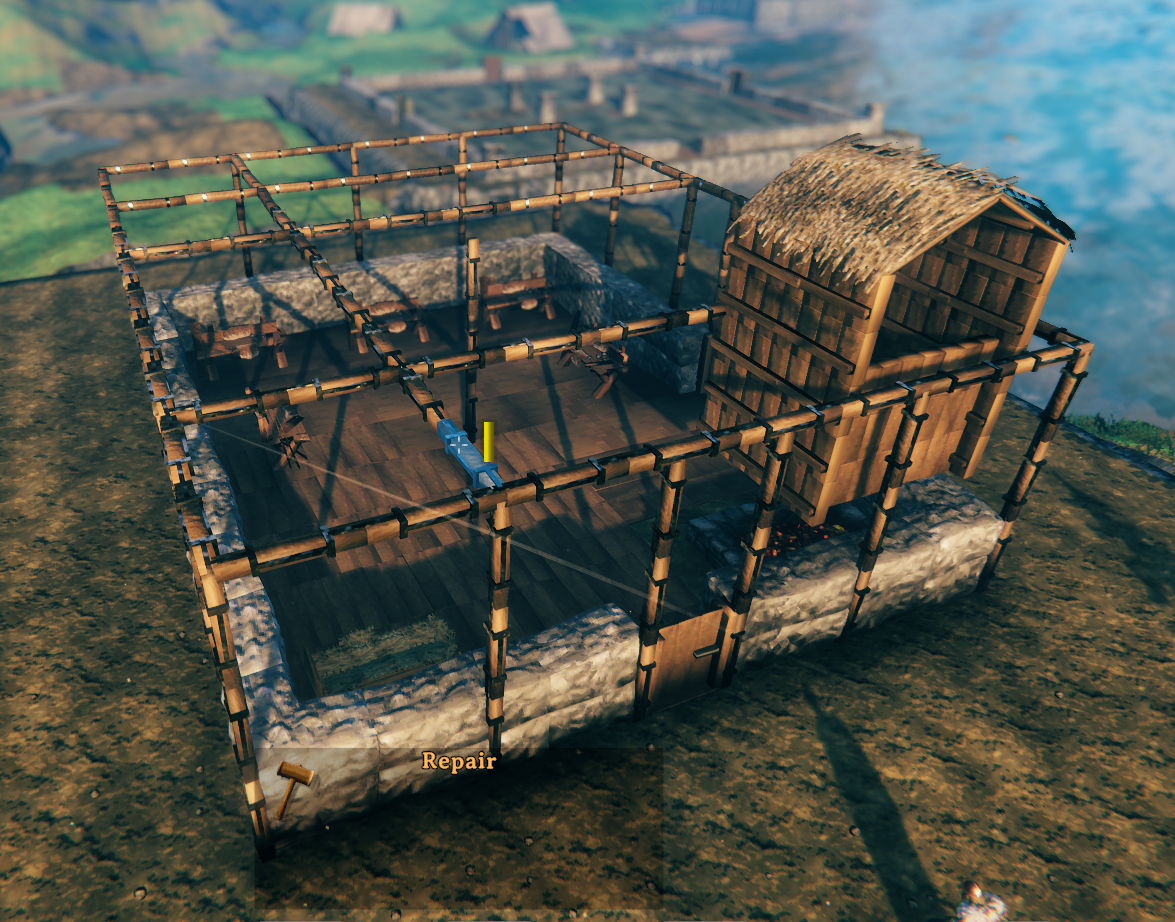
Spiral Staircase Showcase
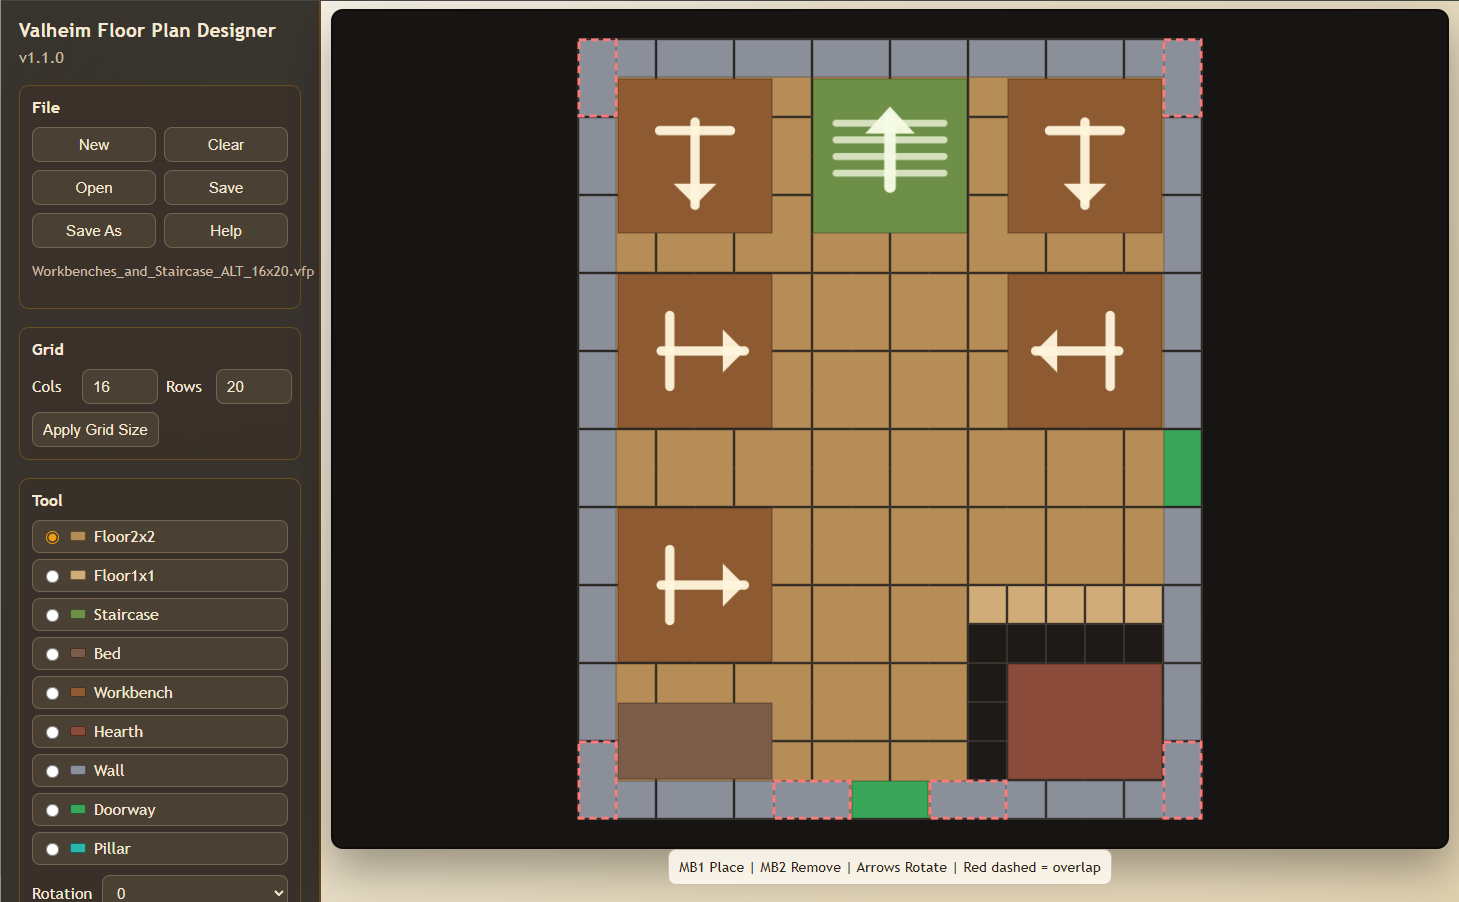
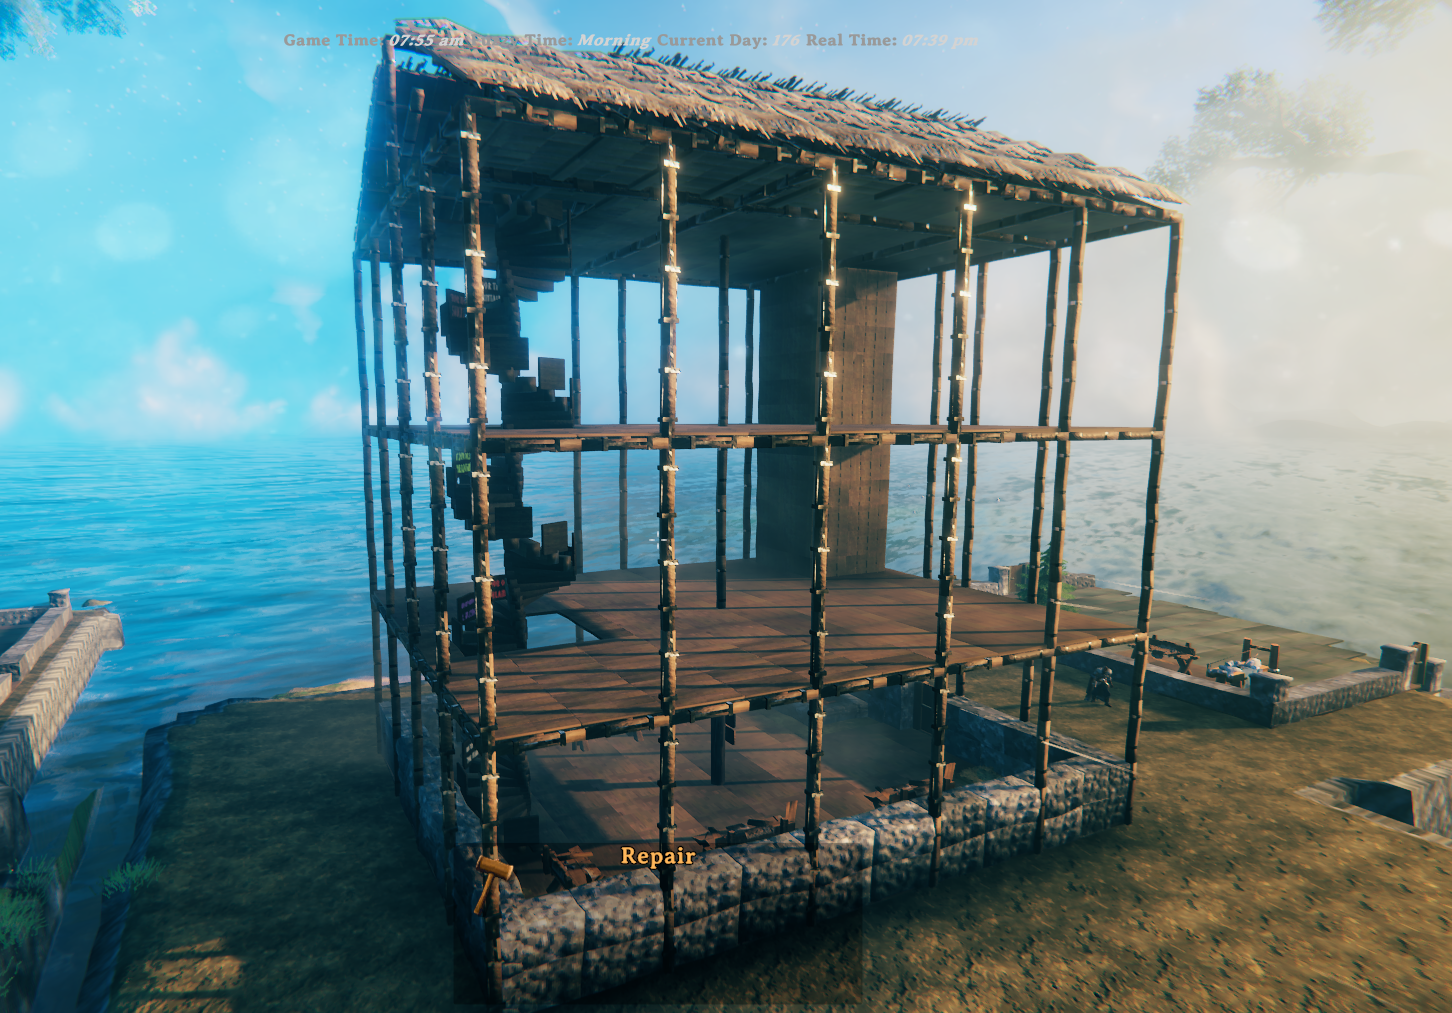
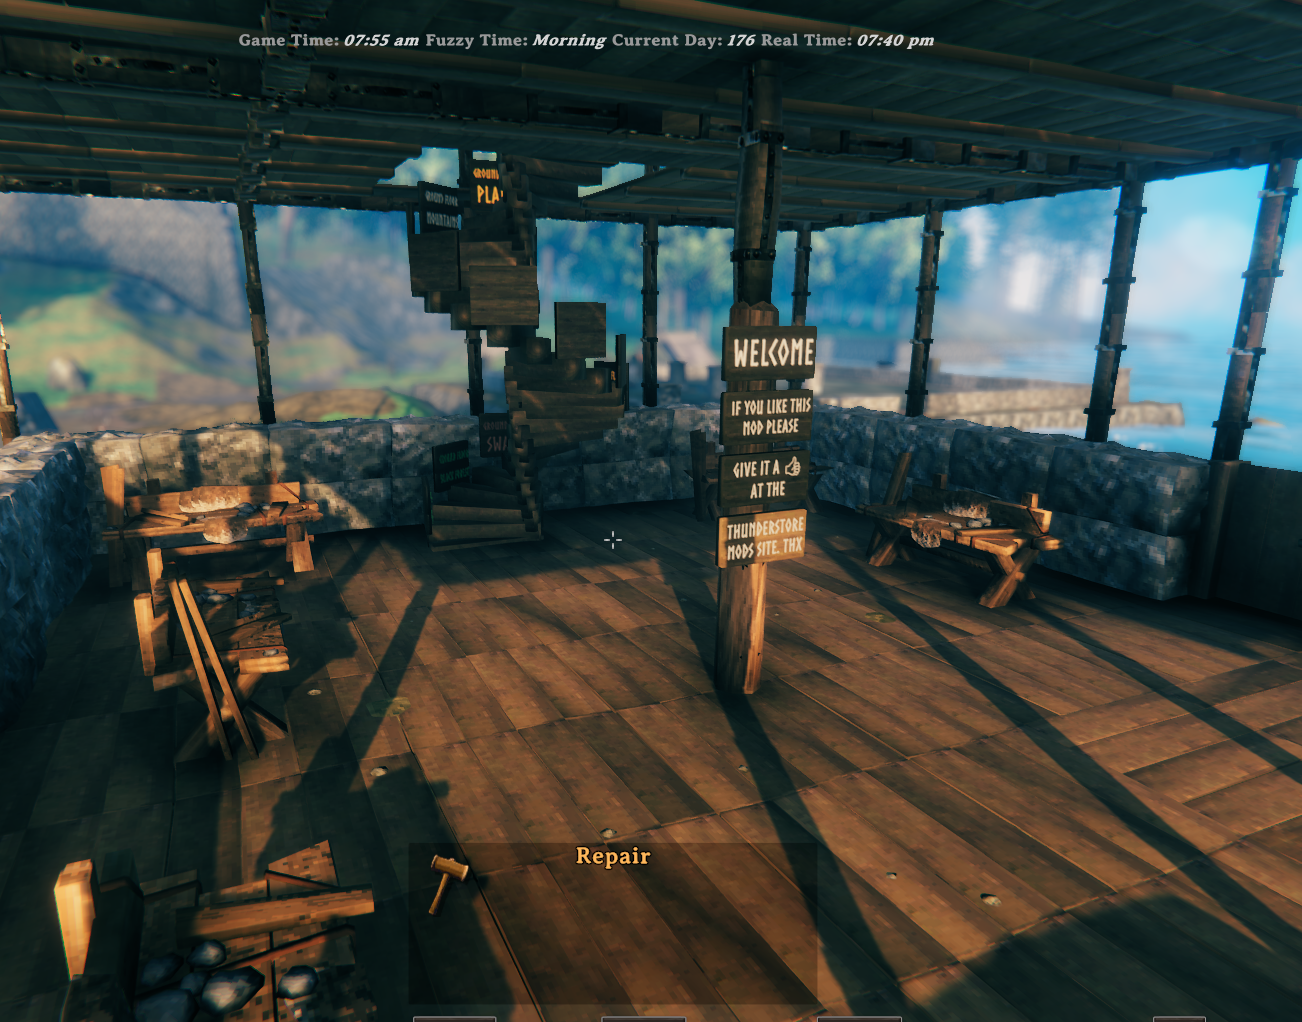
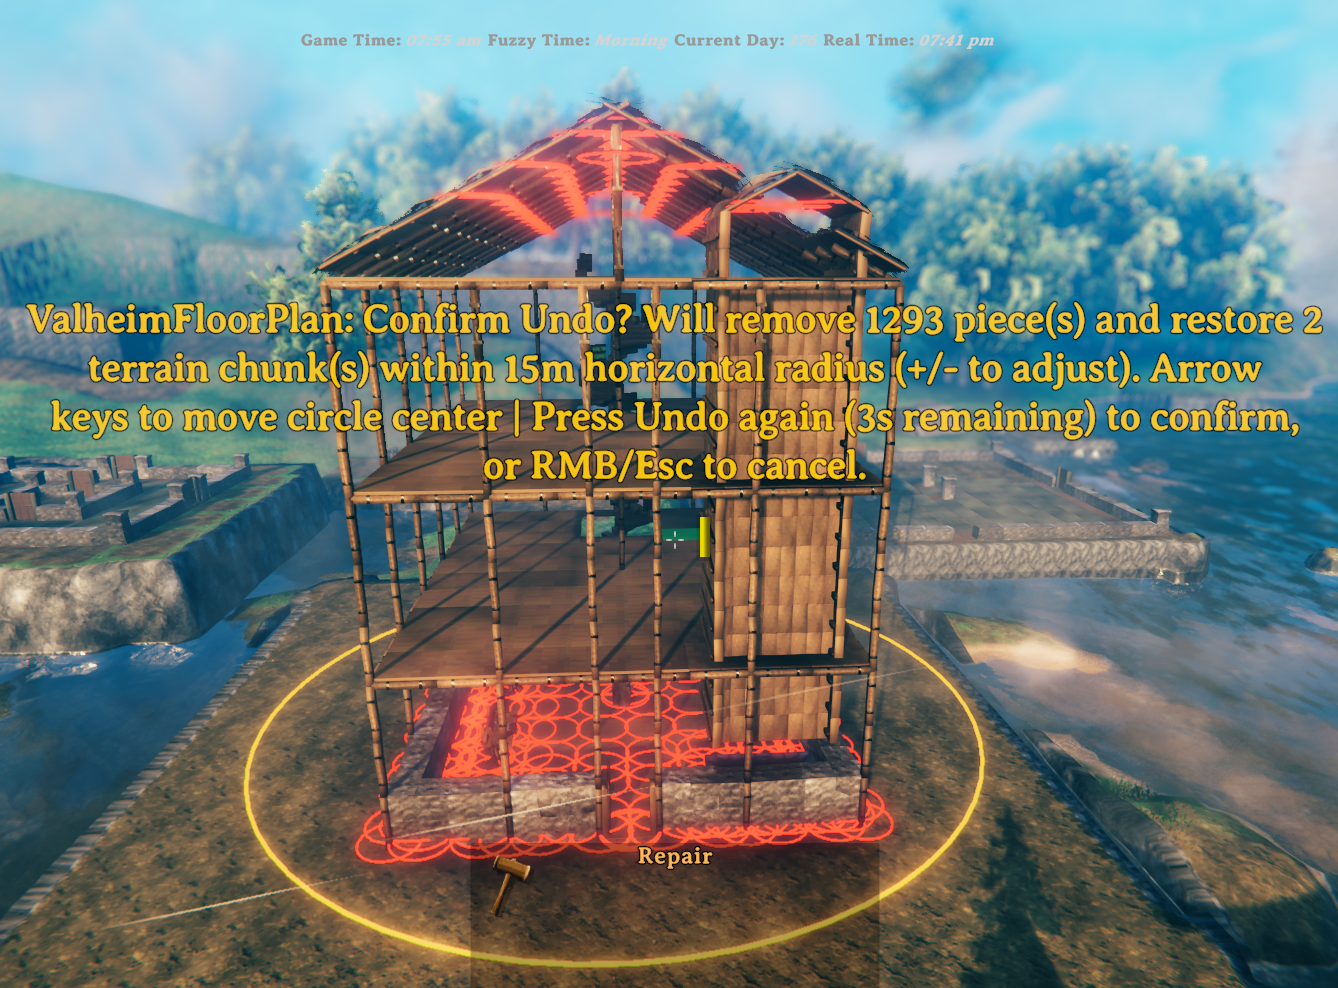
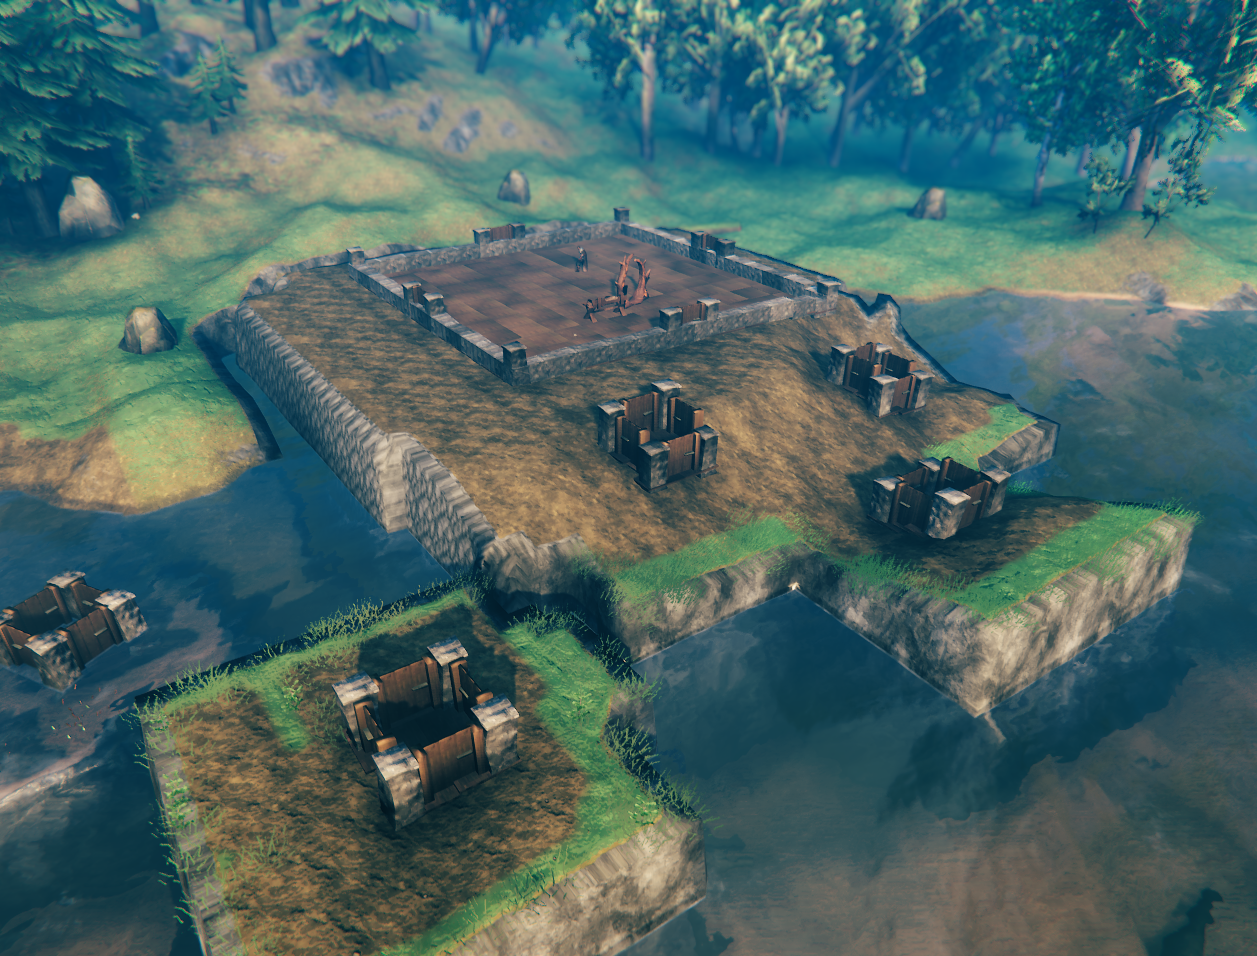
Example Layouts
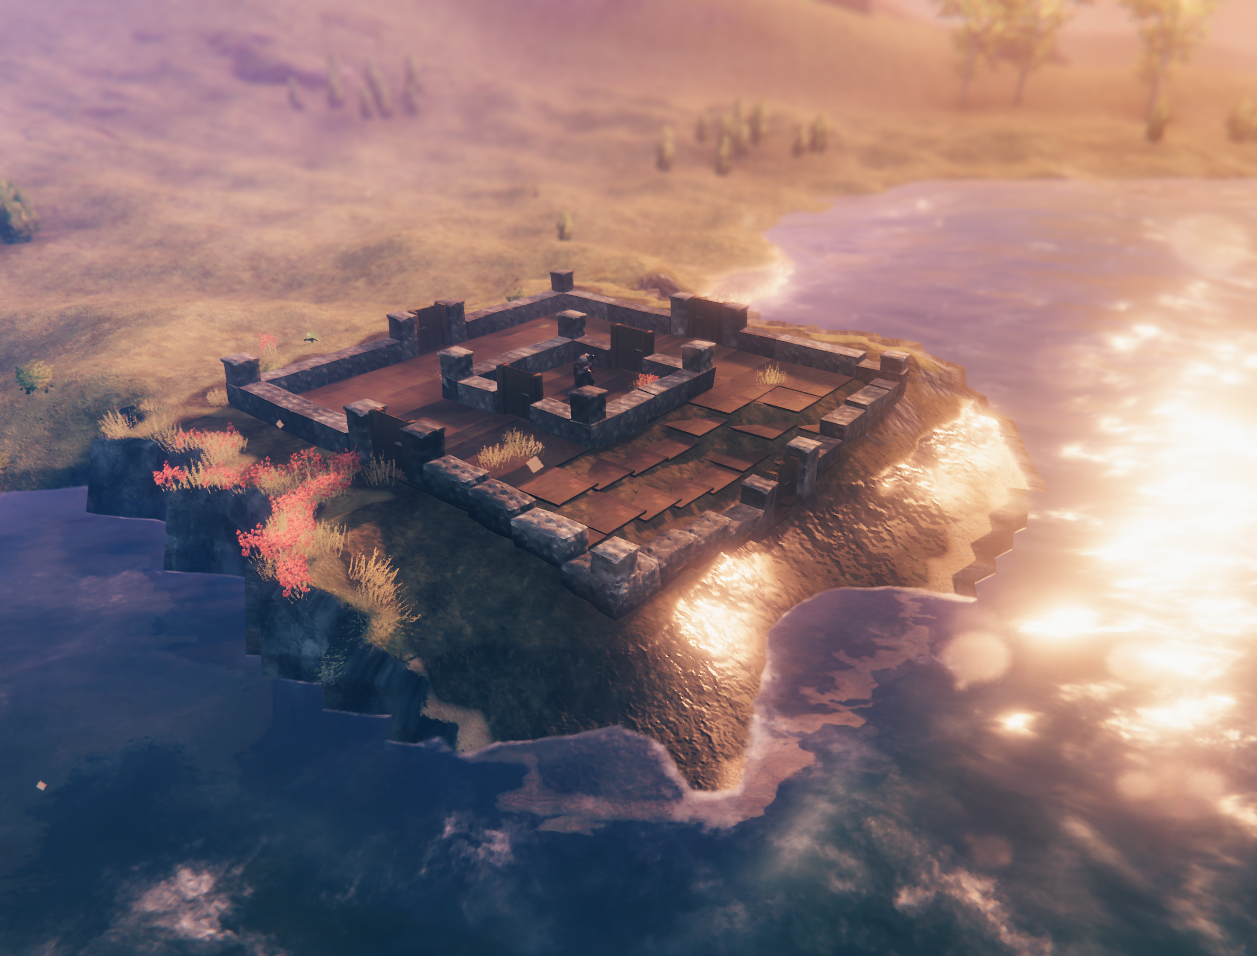
FlexiWall Showcase
Round houses, multi-arc layouts, and multi-level curved stone builds using the FlexiWall tool.
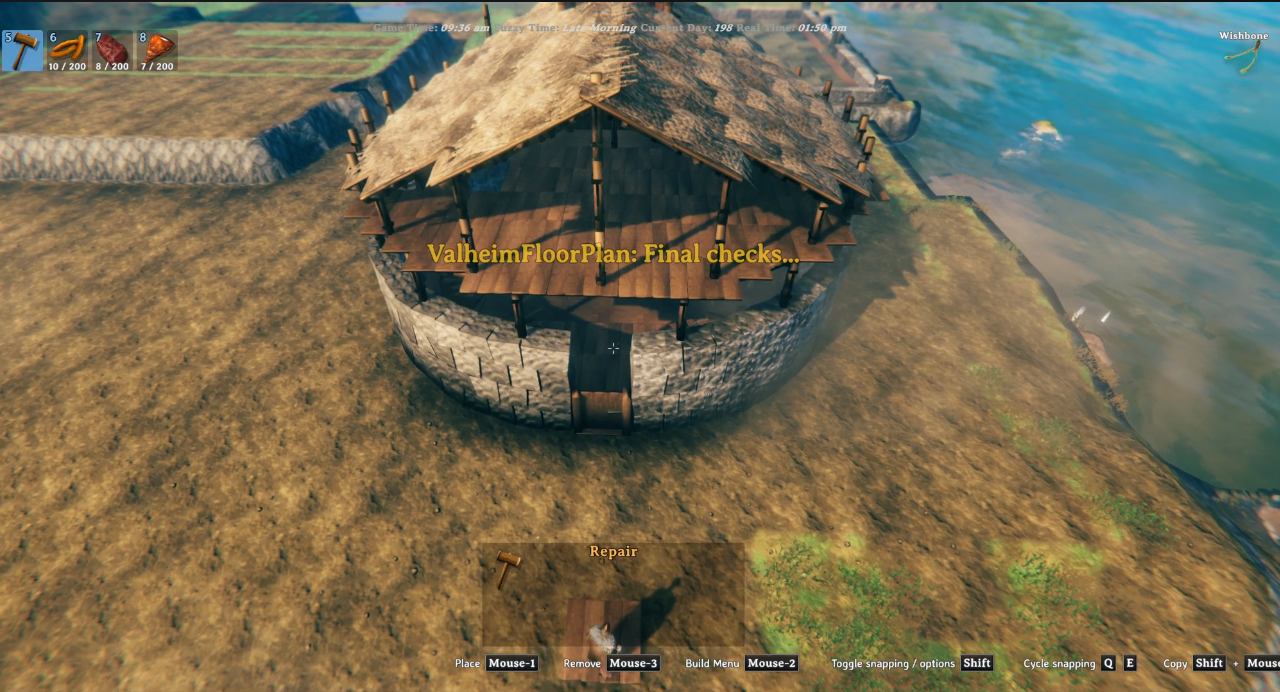
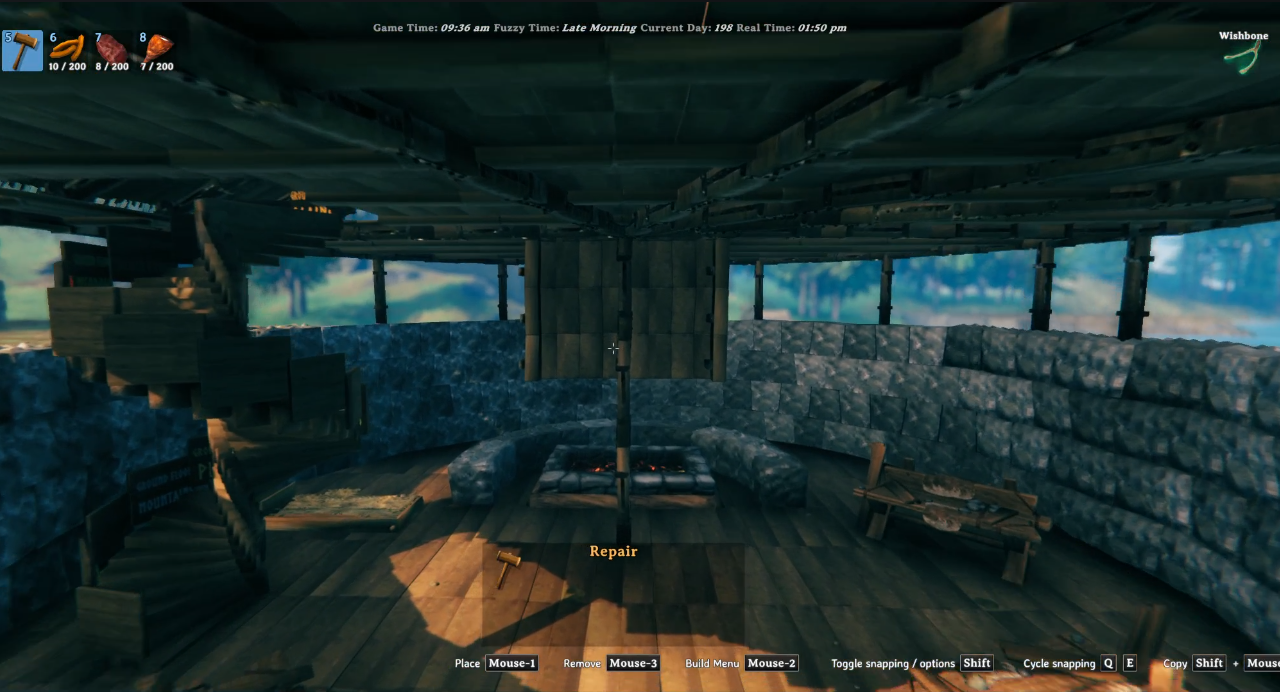
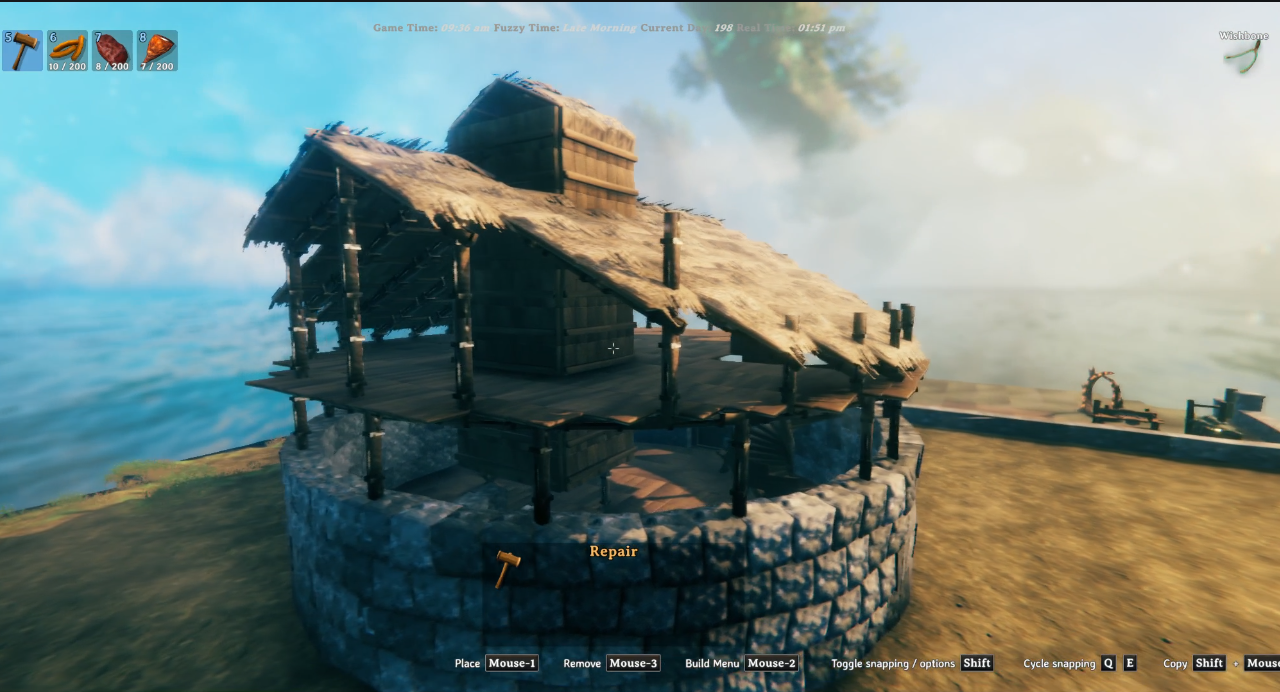
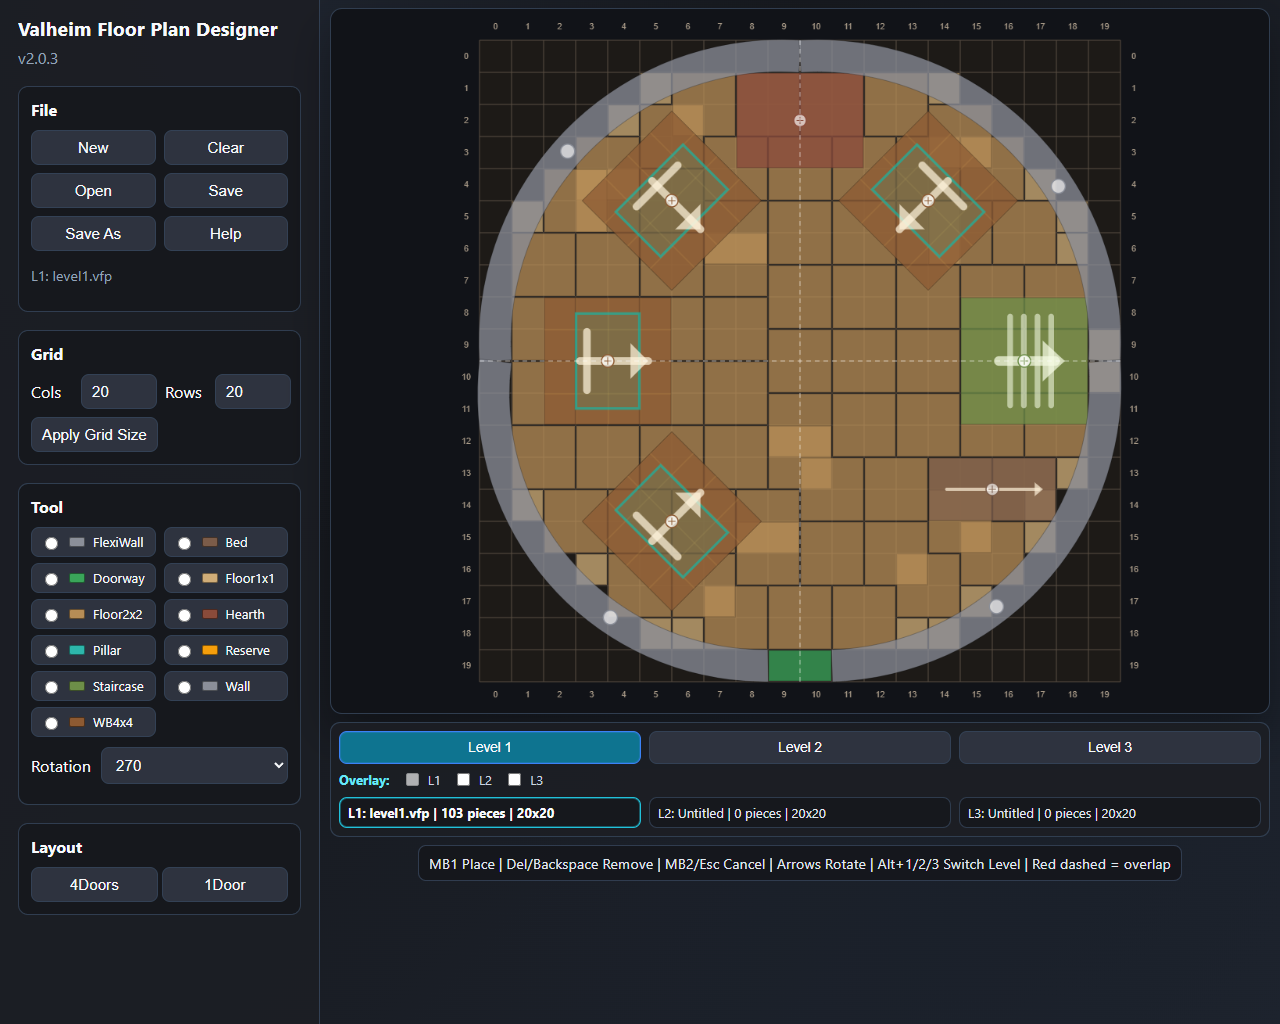
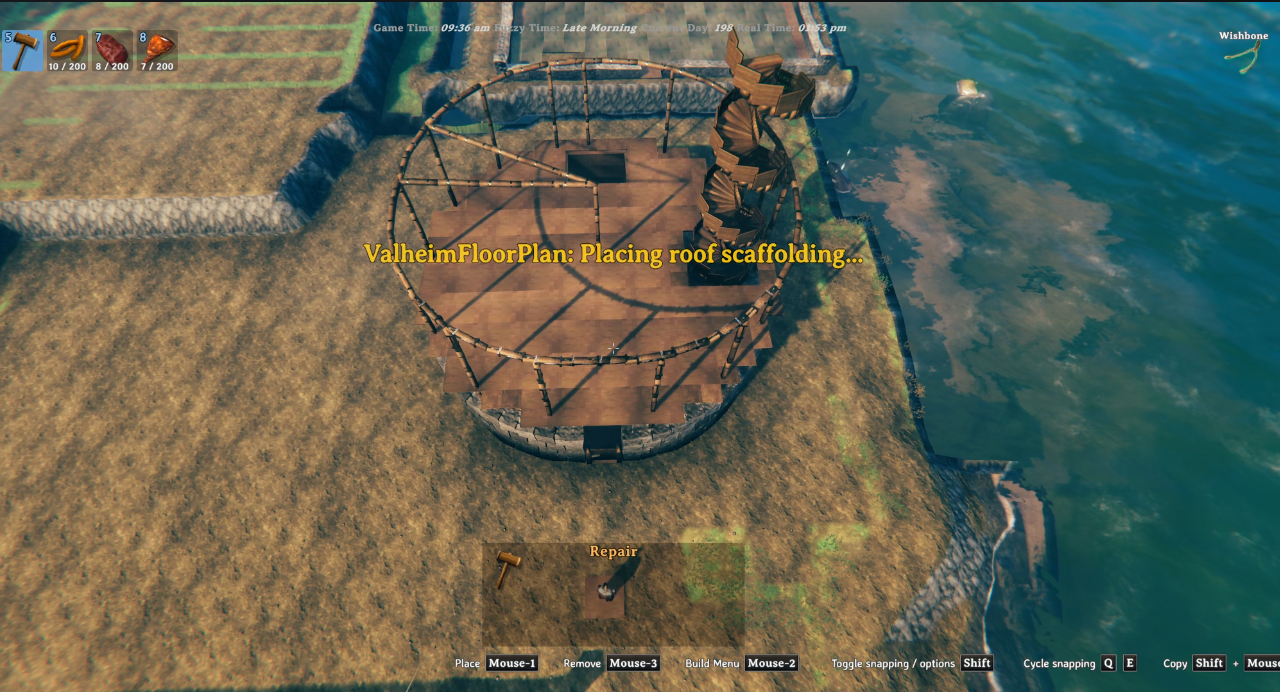
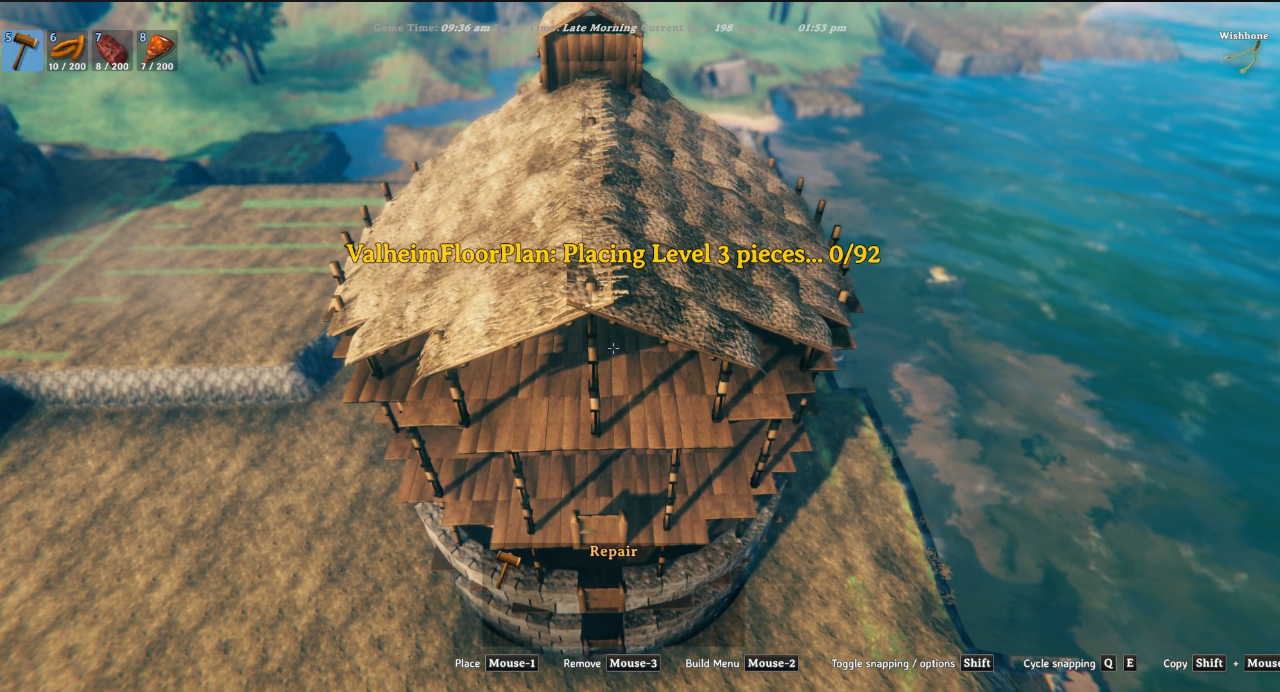
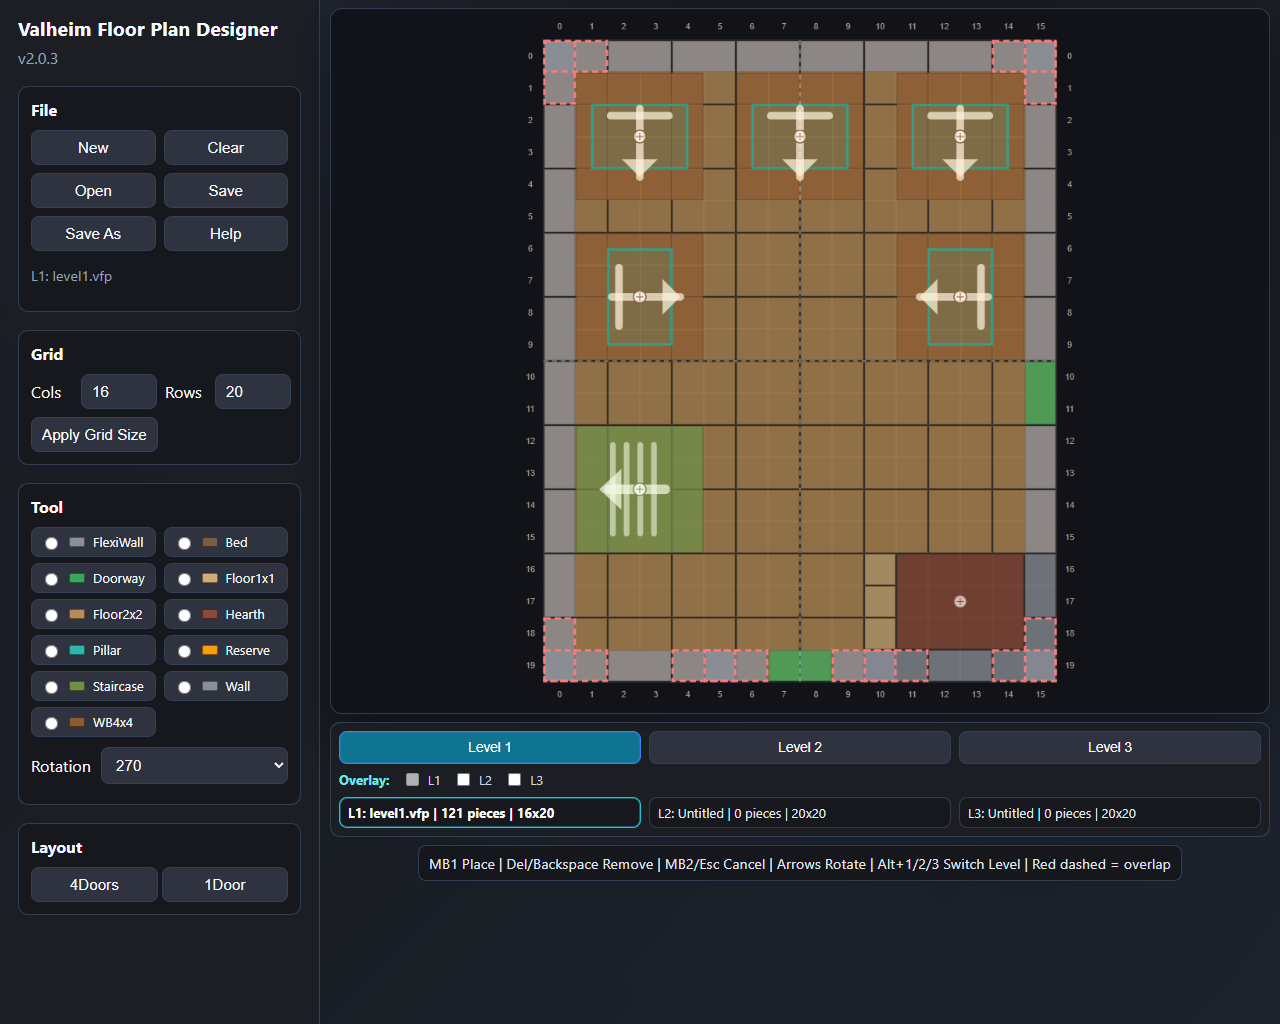
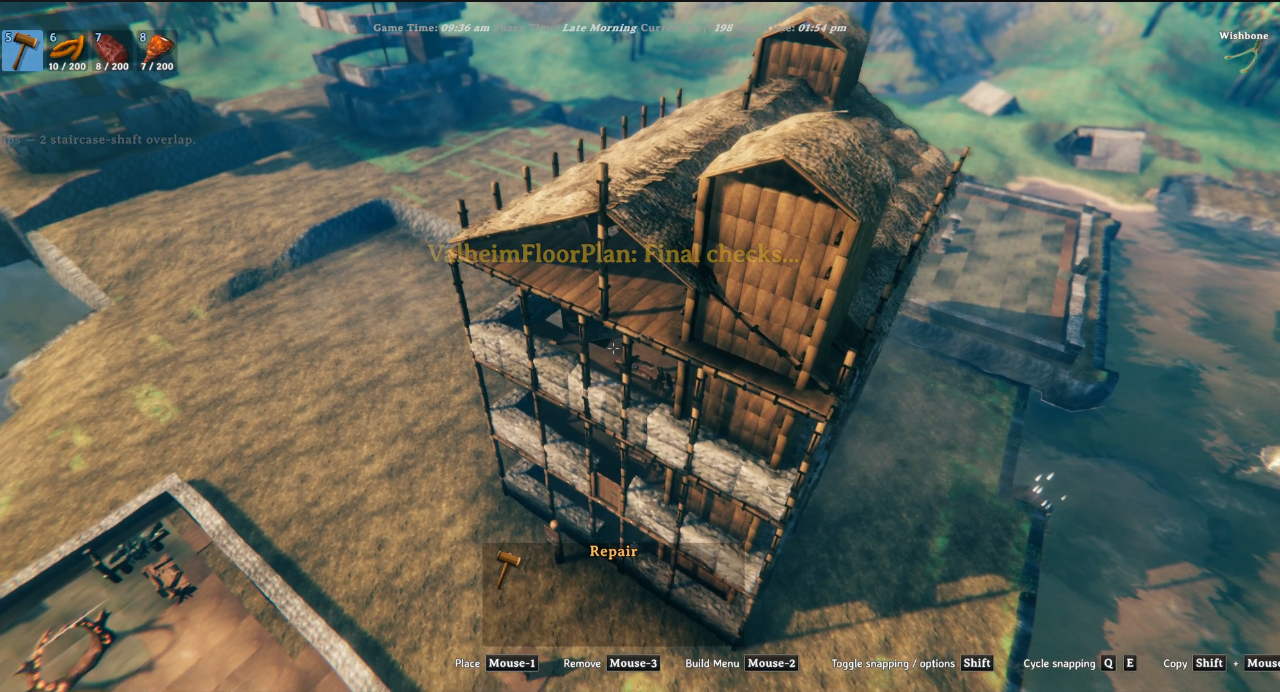
OpenTop Showcase
Package contents include:
BepInEx/plugins/ValheimFloorPlan/ValheimFloorPlan.dllBepInEx/plugins/ValheimFloorPlan/Designer/...images/...(included in the package archive)samples/...(example.vfpplans)
Notes
.vfpis the contract between the Designer and the mod.- Keep the format stable when changing either project.
- If you evolve the format, update both parser and exporter together.
Acknowledgements
Development of the Valheim Floor Plan mod and the Valheim Floor Plan Designer web app used:
- Visual Studio Code
- GitHub Copilot
- Various auto-selected AI models during implementation and refinement
CHANGELOG
Changelog
2.1.4
-
New in-game configuration panel (
Shift+F8): PressShift+F8at any time during a game session to open a full settings panel covering all mod options. The panel has six tabs:- General — load a preset bundle via the file browser, set floor plan file paths (Levels 1/2/3) via the file browser, number of levels, undo radius, HUD message positions, welcome post toggle
- Building — wall/pillar material, external and internal wall heights per level, staircase reach mode and step settings
- Scaffolding — roof scaffolding toggle, open top, roof style, gable flooring mode, scaffold levels, floor heights, floors and beam toggles
- Preview — forward offset, move step, fine move step, rotation snap (coarse, fine, build snap)
- Terrain — levelling passes, spike cleanup passes, stamp radius, high-point delta, staged raise settings (yellow caution note shown)
- Keys — read-only reference for all hotkeys and preview key bindings (yellow read-only note shown)
All controls write directly to the BepInEx config file when you click Apply or Close — no manual file editing required. Mouse, keyboard, and camera input are fully blocked from the game while the panel is open. Hotkeys are shown read-only in the Keys tab; to rebind any hotkey edit the BepInEx
.cfgfile directly. -
In-panel file browser: each floor plan file field and the bundle name field have a
[...]browse button. The file browser opens as a draggable overlay window, supports directory navigation, and filters to.vfpor.vpfsetfiles as appropriate. Selecting a bundle file performs a full import — all settings and the three floor plan file paths are updated immediately and reflected in the panel.
2.1.3
- New
OpenTopconfig option: whentrue, leaves the topmost scaffold level open to the sky — no roof deck, no beams, and no vertical scaffolding on the external walls of the topmost level, regardless ofScaffoldingFloorsorRoofStyle. Hearth chimneys still rise through the open level. Staircases are clamped to the highest real floor deck. Works consistently for 2-level and 3-level builds. RoofScaffoldingTypereplaced byRoofStyle+OpenTop:RoofStylecontrols the deck shape (Gable/Flat);OpenTopis a separate boolean that overrides all topmost-level placement. Automatic migration: on first load the mod reads any existingRoofScaffoldingTypevalue, writes the equivalentRoofStyle/OpenTopvalues, removes the old key, and saves the config. No manual config editing required. Legacy.vpfsetpreset files are also migrated in memory when loaded.- Hearth chimney corners now have vertical support poles. Four
woodiron_polecolumns are placed at the corners of each Hearth chimney shaft, one column per scaffold level, spanning the full configured floor height for that level. This anchors the chimney walls to the floor at every level and is applied regardless ofOpenToporRoofStyle. - Beam spans no longer skip entirely when a chimney or staircase is nearby. Previously, a transverse or longitudinal beam was omitted entirely if any part of its span overlapped a Hearth or Staircase footprint. Each 2m beam piece is now checked individually, so only the pieces whose centres fall inside the opening are skipped and the rest of the beam is placed normally.
- Tight-radius FlexiWalls now place proportionally more wall pieces. On curves tighter than ~3m radius, the rotation angle between adjacent wall pieces now scales down in proportion to the radius instead of growing as the curve tightens, closing the wedge gaps that used to open up on the outer face of small arcs and circles. Gentler curves are unchanged.
2.1.2
-
New FlexiWall tool in the Designer: draw curved or straight walls of any shape — arcs, circles, sweeping curves — that are not constrained to the rectangular grid. Select the tool, click a start cell, click an end cell, then drag the midpoint handle to bend the arc into shape. Endpoints snap automatically to the correct cell-edge boundary so adjacent FlexiWalls meet without gaps.
-
Full circle support: placing start and end in adjacent cells and dragging the midpoint to the opposite side of the circle produces a closed ring wall — both in the Designer preview and the in-game build.
-
New
InternalWallHeightLevel1/2/3config parameters: FlexiWalls whose control points lie strictly inside the layout perimeter are now treated as interior walls and stacked to the newInternalWallHeightLevelheight instead of the external wall height. Set it lower thanExternalWallHeightLevelfor half-height room dividers, or match it for uniform wall height throughout. -
Fixed: Gable roofs no longer have gaps caused by openings below. Staircases, Hearths, and other upper-level openings could previously block or punch holes through Gable roof panels, leaving the roof incomplete. The Gable roof now always builds as a full, continuous surface across the entire footprint regardless of what's underneath it.
-
Fixed: Staircases no longer leave holes in the roof above them. Roof tiles directly over a staircase shaft were being destroyed during cleanup even though staircases don't need an opening through the roof — they're now left intact, so the roof stays solid above stairwells.
-
Fixed: Hearth chimneys now properly clear Gable roofs. Chimney stacks — including those on the ground floor — now measure their height against the actual roof apex and clear away any surrounding roof and deck tiles, so the chimney extends cleanly above the roofline instead of being blocked or clipped by it.
-
Designer: Excel-style row/column reference labels. Numeric grid references now run along all four edges of the canvas (top/bottom for columns, left/right for rows), matching the same 0-based
col/rownumbering used internally and in.vfpfiles, making it much easier to line up placements by eye or by coordinate. -
Designer: furniture pieces are now selectable, movable, and rotatable after placement.
Bed,Staircase,Hearth, andWorkbenchpieces show a small handle at their centre once placed (or loaded from a file). Drag the handle to move the piece, click it to select it, then use the arrow keys or mouse wheel to rotate it in place — no need to delete and re-place a piece just to nudge or turn it. -
Designer: reworked right-click and deletion to prevent accidental removals. Right-click (and
Escape) now simply cancels whatever's active — an in-progress FlexiWall draw, a piece selection/drag, or the current tool — without deleting anything. To delete a piece, hover it and pressDelete/Backspace; this also removes the currently selected piece if one is selected.Escapealso now reliably clears tool selection and any in-progress interaction, returning the cursor to normal. -
Designer: FlexiWalls use the same select-then-delete flow as furniture pieces. Placed FlexiWalls show a midpoint handle that can be clicked at any time (no need to have the FlexiWall tool active) to select the wall — shown with the same dashed yellow outline used for selected furniture — and then removed with
Delete/Backspace. Right-click on a FlexiWall handle no longer deletes it; right-click is now purely a cancel action everywhere, matchingEscape. While the FlexiWall tool is active, the handle still drags to reshape the curve as before. -
Designer: selecting a placed piece via its handle also activates the matching tool. Clicking a furniture piece's or FlexiWall's handle switches the active tool radio to that piece's type — for FlexiWalls, this is what re-enables the handle's drag-to-reshape behavior immediately after selecting it.
-
Designer:
Delete/Backspaceremoval is now scoped to the active tool's piece type. With theHearthtool selected, for example,Delete/Backspacecan only removeHearthpieces — Floors, Walls, and other types under the cursor are left alone, preventing accidental removal of the wrong piece type while focused on one kind. With no tool selected, any piece type can still be removed. -
Designer: the piece
Delete/Backspacewould remove is now highlighted as you hover. When a tool is active (or a piece/FlexiWall is selected), the exact piece that the nextDelete/Backspacepress would remove is outlined and tinted in red on the canvas, so you can see precisely what's targeted before committing to the deletion.
2.0.3
-
New
FloorPlanDirectoryconfig option: Set this to a folder path and theFloorPlanFile,FloorPlanFileLevel2, andFloorPlanFileLevel3fields can then be bare filenames instead of full paths. Preset bundles are also read from and written to this folder when set. Existing deployments with full paths in the file fields continue to work unchanged — full absolute paths are always used as-is regardless of this setting. -
Minor Staircase Tweaks: Minor changes to Step Height and Rotation Angle to make the climb up the steps smoother. Step parameters are now exposed in the config.
-
Support for Upper Level Hearths: An extra horizontal scaffolding support is added underneath the Hearth to prevent it from collapsing when they are on upper levels. May not work in every case but if you place the Hearth near a wall (wood or stone) it should be stable now.
-
Designer Graphics Improved: Improved graphics to help with placement including better overlap detection.
-
Designer Help Expanded: An attempt to build a Valheim Complete Workbench Matrix describing Workbenches, their build material requirements and related Boss info. All intended to help with layout design.
2.0.2
- Documentation updates: Example images showing Three Level Floor Plan.
- Cosmectic : Log Beams surround Hearth to make it look better.
- Hearth Upper Floor Limits: If you place a Hearth on an upper level it may break unless it is supported properly. Best to place it so it connects/touches to a Stone outer edge wall which has scaffolding support
- Workench Placement Angles: Workbenches can be rotated in increments of 22.5 degreee angles. See StarBase.vpf
2.0.1
-
Upper-level preview bands: when
FloorPlanLevelsis2or3, the in-world build preview now shows a red floating rectangle at the height of each upper floor (based onScaffoldingFloorHeight/ScaffoldingFloorHeight#2), so you can see the full multi-storey footprint before confirming placement. -
Keep-terrain undo mode (
Ctrl+F9): a new hotkey (configurable viaUndoKeepTerrainHotkey, defaultCtrl+F9) starts a piece-only undo that removes VFP pieces but discards the terrain snapshot, so leveled ground is preserved. Confirmation works the same as normal undo — the mode is latched so you can confirm with eitherCtrl+F9orF9within the 5-second window. -
In-game preset bundle manager (
.vpfset): added timestamped export (Ctrl+F8) and interactive timed import selection (Alt+F8) for sharing/reloading full build presets (layout files + non-key config settings). Export file names now use<BundleName>-YYYYMMDD-HHMMSS.vpfset, and after import the configBundleNameis normalized back to the imported preset prefix (timestamp removed). Import selection shows bundle name plus index (X of N), supportsRight/Leftnavigation,Enterto confirm import,Escapeto cancel, and auto-cancels on timeout. -
3 Level Build Demo video published: https://youtu.be/jz39KSSfhJ0
2.0.0
-
Critical bug fix — terrain levelling restored: A long-standing coordinate offset error in
TerrainLevelercaused all stamp positions to be calculated hundreds of metres away from the actual build site whenever the player was not near world origin. As a result, terrain levelling was silently skipped on virtually all real-world builds. This has been corrected; levelling now works correctly at any world position. -
Designer now supports 3 in-memory level layouts with quick switching (Level 1/2/3), per-level file/dirty state, and overlay checkboxes for cross-level visual planning.
-
Overlay clash hints are now directional and content-aware: bright red dotted outlines flag overlap candidates across visible levels, with lower-level Staircase/Hearth projecting upward while non-vertical tools do not.
-
Bed pieces now show a head-direction arrow in the Designer, and are placed in-game with the correct head orientation matching the Designer layout.
-
Expanded multi-floor support for 2nd and 3rd floor plans, including upper-level staircase placement.
-
Multi-level builds now place pieces level-by-level with route-critical parts first (staircases/hearths), then remaining pieces.
-
Stair and chimney shafts are now treated as protected vertical routes so higher-level pieces do not block those paths.
-
Upper-level floor tiles from plan files are skipped when scaffold decks already provide those floors, avoiding duplicate overlap.
-
Improved clash feedback for upper levels:
- clearer warning categories in HUD/logs,
- per-level clash signposts with level-specific detail signs.
-
Improved upper-level wall behavior:
- walls/pillars/doorways can be placed on upper-level perimeter cells,
- perimeter wall/pillar height now uses per-level settings (
ExternalWallHeightLevel1/2/3) with dynamic per-level caps.
-
Added
StaircaseReachModeconfig (ToTheNextLevelOnly/AllTheWay) to control whether staircases climb only to the next level or continue to the highest available level. -
Fixed staircase shaft punch-through so deck/beam openings and higher-level staircase-shaft blocking now respect
StaircaseReachMode(no extra holes above the configured reach). -
Improved validation and warnings for invalid upper-floor layout files and bounds mismatches.
-
Updated and expanded user/developer documentation to describe current multi-level behavior.
1.1.0
- New Spiral Staircase build feature: added a compact center-pole spiral staircase that climbs from ground floor toward upper scaffold floors/roof with improved step flow and safer outer-edge guarding.
- Scaffolding beam options now auto-enable for multi-level scaffolds: when
ScaffoldingLevelsis set above1,TransverseScaffoldingBeamsandLongitudinalScaffoldingBeamsare automatically forced totrueand written back to config so the saved settings match the required build behavior. - External wall height now follows scaffold capacity:
ExternalWallHeightis now capped atScaffoldingLevels x ScaffoldingFloorHeight, and oversized values are clamped back to the maximum allowed by the current scaffold setup. - Scaffold levels can now use different heights: added
ScaffoldingFloorHeight#2andScaffoldingFloorHeight#3so each scaffold story can use its own validated height, andExternalWallHeightnow caps against the sum of the active scaffold floor heights. - Hearths now cut scaffold floor openings and vent through wood chimneys: scaffold decks leave open space above Hearth footprints, and a wood chimney stack starts about 3m above the Hearth so the fire remains accessible while smoke can exit above the top scaffold level.
- Top scaffold roof mode is now configurable: added
RoofScaffoldingTypewithGable(default) andFlatoptions for the topmost scaffold level whenScaffoldingFloorsis enabled. - Gable top surface is now configurable: added
RoofScaffoldingGableFlooringforRoofScaffoldingType=Gable, withRoofWithFloorUnderlay(default) andRoofOnlyoptions.
1.0.9
- Added Workbench support in Designer and Builder: new
Workbenchtool can be placed in the Designer with rotation support and is built in-game using the mapped workstation footprint. - Added Hearth and Bed tools: the Designer and builder now support
Hearth(4x3) and basicBed(2x4) footprints. - Designer/build orientation now match: preview rotation, final build rotation, and piece placement now follow the Designer layout orientation consistently.
- Roof scaffolding now uses wood-iron members: perimeter scaffold columns and scaffold beams now use
woodiron_pole/woodiron_beam, with 4m columns built from stacked 2m vertical segments. - Scaffold floor height is now configurable in validated 2m steps:
ScaffoldingFloorHeightnow allows2,4, or6metres between scaffold levels so wood-iron support segments stack cleanly. - Internal scaffold support simplified: extra interior vertical support poles were removed and replaced with a single center support column, while transverse and longitudinal beams remain enabled.
- Top scaffold deck can use roof tiles: when scaffold floors are enabled, the topmost full deck tiles now use
wood_roof_topinstead of floor pieces. - Initial build offset is now automatic: startup placement now computes the player-to-build-center stand-off from the plan footprint plus the outer perimeter delta, while
BuildOriginForwardOffsetis now only an optional extra clearance. - External wall height range increased:
ExternalWallHeightcan now be configured up to18levels. - Added
DisableWelcomePostconfig option: center welcome signage can now be disabled when it is not wanted.
1.0.8
- F8 placement pivot moved to plan center: preview/build placement now uses the plan center as the user-facing pivot (instead of corner-origin), making rotation and alignment more intuitive.
- New
ScaffoldingLevelsoption (1-3): when roof scaffolding is enabled, scaffold generation now repeats the full vertical/perimeter/transverse/longitudinal pattern per level at +4m increments. - New
ScaffoldingFloorsoption: when roof scaffolding is enabled, wood floor decks can now be toggled on or off for scaffolding levels. Default isfalse. - Undo now includes elevated scaffold stories: F9 piece selection/removal/highlighting now use horizontal (XZ) radius instead of 3D distance, so upper levels inside the undo circle are not missed.
1.0.7
- Rotation preview/build flow hardened for manual placement: preview rotation now stays aligned to safe 22.5° increments, and confirmed builds snap back onto a configurable safe grid so Valheim's follow-up piece snapping remains usable.
- Rotation settings simplified:
BuildRotationSnapDegrees,RotateStepDegrees, andFineRotateStepDegreesare now restricted to22.5,45, or90degrees to prevent broken off-axis combinations. - Fine rotation now works correctly: holding the fine-adjust modifier applies the configured fine rotation step during preview instead of being immediately cancelled by coarse snap logic.
- Preview rotation bindings updated: default preview keys are now
Qrotate left,Grotate right,Econfirm,Esccancel, withLeftShiftas the fine-adjust modifier. - New interior roof-scaffolding beam options: added
TransverseScaffoldingBeamsandLongitudinalScaffoldingBeamsfor horizontal beam runs between interior scaffold poles.
1.0.6
- Build orientation now follows camera view: The plan is oriented based on the game camera's facing direction rather than the character's body rotation, so the origin is always at the bottom-left of the player's screen view regardless of how the character model is facing.
- New Roof Scaffolding option: When enabled, automatically places wooden poles at plan corners and door jambs (with gap-fill poles on long spans), connected by horizontal log beams along all four edges, to guide roof placement. Disabled by default; toggle via the
RoofScaffoldingconfig option. - File-not-found error feedback: If a
.vfpfile cannot be loaded (preview or direct build), an on-screen centre message now explains the failure instead of silently doing nothing.
1.0.5
- Undo confirmation circle is now movable: During the undo confirmation window, press arrow keys (configurable preview move keys) to move the search circle centre and reselect which pieces to target for removal.
- Arrow key movement in undo confirmation respects camera angle (like preview mode) and supports fine-adjust modifier (default
LeftShift) for precise positioning. - All undo adjustments (radius or circle centre movement) now restart the 5-second confirmation timer, giving the player a full window after each change.
- Updated undo confirmation HUD message to indicate "Arrow keys to move circle center" as a control hint.
- Documentation: correction to Desiger path
- New user guide and example images
1.0.4
- Replaced the flat X origin marker with a tall vertical flagpole (10 m, bright yellow) so the build origin is visible above terrain, water, and underground surfaces during preview.
- Undo confirmation now shows per-piece red highlight rings around every VFP piece within the undo radius so the player can see exactly what will be removed.
- Undo confirmation now shows an orange boundary circle on the terrain at the full undo search radius edge.
- Reduced the default undo search radius from 75 m to 15 m.
- Added
UndoRadiusconfig option (range 5–150 m, default 15 m) to control the undo search radius. - During the undo confirmation window, pressing
+/-(or numpad equivalents) adjusts the radius by 5 m; the new value is saved to config and highlights/boundary circle refresh immediately. - Pressing RMB or Escape during the undo confirmation window cancels the undo and clears all highlights.
- Undo confirmation HUD message now shows the current radius,
+/-adjustment hint, and RMB/Esc cancel reminder. - Added
ValheimFloorPlanPlugin.Instancestatic property andSetUndoRadius()helper to support live config write-back fromFloorPlanBuilder.
1.0.3
- Bumped mod, manifest, and Designer app version numbers from 1.0.2 to 1.0.3.
- Updated Thunderstore dependency to
denikson-BepInExPack_Valheim-5.4.2333. - Added a comprehensive README Config Options section documenting all BepInEx settings, defaults, ranges, and preview keybinds.
- Updated README callout formatting by replacing blockquote notes (
>) with plain bold "Note/IMPORTANT" lines for better Thunderstore dark-theme readability. - Rebuilt and repackaged Thunderstore release (
ValheimFloorPlan-1.0.3.zip) including mod DLL + Designer app.
1.0.2
- Expanded the README package description/introduction for clearer context and feature overview.
- Added additional README notes for in-game build placement controls (preview movement/rotation/confirm/cancel keys).
- Updated README with a new Examples section using three new screenshots from
images/. - Fixed Designer
Shelllayout generation so doorways are placed first and walls no longer overlap doorway footprints. - Improved Shell edge placement behavior on odd-sized grids by skipping wall segments that intersect doorway area.
- Rebuilt and repackaged Thunderstore release (
ValheimFloorPlan-1.0.2.zip) including mod DLL + Designer app.
1.0.1
- Documentation change only; fixed broken README image links.
1.0.0
- First stable release.
- Added configurable terrain target offset:
TerrainHighPointDelta(Highest + Delta,0.0to4.0). - Preview walls and risk markers now reflect adjusted target height.
- Undo confirmation feedback now appears immediately on first key press.
- Finalized stable plugin GUID:
com.alexdroz.valheimfloorplan. - Added and documented partner Designer app workflow.
- Included Designer app in Thunderstore package contents.
- Development used Visual Studio Code, GitHub Copilot, and various auto-selected AI models.
